


Recipe versions for this cake have been around for many years and most that I've seen use a boxed cake mix and refrigerated whipped topping. I'm would assume that the original recipe was made with all fresh ingredients for both the cake and the filling/frosting. This one seems to fall somewhere between the two. It calls for both prepared ingredients and some scratch. In this case for instance, it's the cake. All I know is that it's one of those wonderful food memories from my childhood that Mama made. As a matter of fact, for several years it was my birthday cake request.
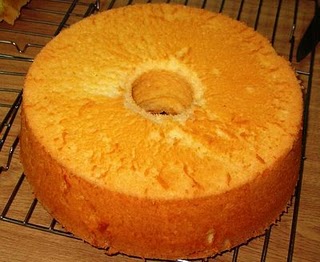
** Mom used to buy a packaged orange Chiffon Cake from the only place around here that carried them.... The A&P. For some reason, they stopped carrying them in the 80's. Mama never made the cake again, but I found an excellent recipe for a scratch Orange Chiffon Cake, because I just couldn't live the rest of my life without this cake in it!
Mandarin Orange/Pineapple Cake
The Cake:
This cake can be made a day ahead and refrigerated until ready to use.
- 1 3/4 Cups Self Rising Flour
- 1/8 tsp of Salt
- 6 Egg Yolks
- 1/2 cup of Granulated Sugar
- 3/4 cup Mandarin Orange juice/Tangerine juice/Orange juice
- Zest of 1 medium Orange
- 1/4 cup of Vegetable Oil
- 3/4 cup of granulated sugar
- 6 egg whites
- 1 tsp of cream of tartar
Pre-heat oven to 325 degree F.
Sift Flour and Salt onto a sheet of waxed paper. In a large bowl, beat the yolks, 1/2 Cup of Sugar, 3/4 Cup Orange Juice, 1/4 Cup Oil and Zest until pale yellow and slightly thickened. Add Flour and Salt mixture to the bowl and mix by hand until smooth. Set it aside.
Beat 3/4 Cup Sugar, Egg Whites and Cream of Tartar on high speed until stiff peaks are formed. They should not fall out if you turn the mixing bowl over. Gently fold the Egg Whites into the Egg Yolk/ Flour mixture in thirds until fully incorporated, being careful not to deflate it too much.
Pour batter into ungreased 10" tube pan or two 9" round cake pans and bake for 55 to 60 minutes or until a wooden skewer inserted into the center of the cake comes out clean.
Use a long piece of clean thread or unflavored dental floss to slice the cake into 4 layers. (or each 9" round cake in half) Now, this might sound difficult but if you measure out your layers with a ruler first and insert a long wooden skewer into the cake at each place where you wish to cut it, the thread or floss will glide right on top of the skewer (pulling toward yourself in a side to side motion) very easily. A good bread knife will work too.
Place each layer on it's own sheet of waxed paper in preparation for being brushed with syrup. (recipe follows) You can mark each sheet of waxed paper with a food safe marker so that you can make sure that your layers go back on in the order that they were removed.
In the spirit of full disclosure, I should mention that you can use a store bought Sponge, Angel Food or Chiffon Cake (if you can find one) or there are a few boxed Chiffon Cake mixes out there too, but trust me... the scratch cake is so worth the additional steps that it requires.
Next.... Once cooled, brush each layer of the cake with about 1/4 cup of simple syrup and allow it to soak in. (I often add about 2 Tbls of Orange Liqueur {ie. Grand Marinier} to my cooled syrup before this step)
Simple Syrup:
- 1 Cup Granulated Sugar
- 1 Cup Water

You should never stir a simple syrup with a spoon until after the sugar has dissolved completely. The pan itself can be swirled a bit as it simmers, but stirring it can cause it to form crystals, which you do not want.
Simple Syrup can be used in so many things. It's the traditional sweetener for homemade Southern Sweet Tea and Lemonade. It can be infused with any number of flavors and is a key ingredient in some of the most delicious and popular cocktails out there, from Margaritas to Mojitos.
I always make a triple or even a quadruple batch to use in all kinds of recipes. It will keep quite well in an airtight jar or container for a couple of months when refrigerated. Some chefs say that it doesn't need to stay cold, but I made some several years ago for our bar, and even though I had it in an airtight container, it got stale or what I felt was actually moldy, after a week without refrigeration.
So... Back to the Cake:
 |
| The frosting/filling is a bit lumpy so it's not the prettiest thing, but boy oh boy, is it ever delicious! |
- 1&1/2 Cups Very Cold Whipping Cream
- 1 5.1oz Box Instant Vanilla Pudding/Pie Filling Mix
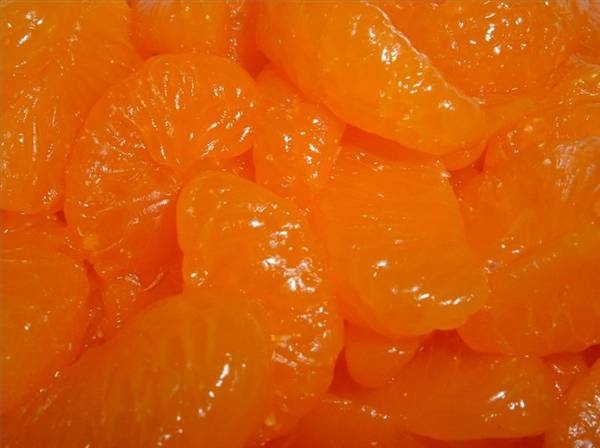
- 1 15oz Can Mandarin Oranges, drained very well
- 2 8.5oz Cans Crushed Pineapple, drained very well
Roughly chop all but about 15 of the drained Mandarin Orange pieces, leaving the extra segments whole to decorate the finished cake.
Add the drained Crushed Pineapple and drained and chopped Mandarin Oranges to the Cream and Pudding mixture and combine thoroughly by hand, so as not to break up the chopped fruits any further.
Chill this mixture for about 30 minutes so that it will thicken and set up better.
When ready to assemble the cake, start stacking the cake layers, spreading about 1/2 Cup of the frosting on each one. When all the layers are filled and stacked, frost cake top and sides with remaining frosting.
Decorate the top of the Cake with the reserved Orange segments if you'd like to, and chill for at least 1 hour before serving. (2 to 4 hours is even beter)
Enjoy!
 |
| I didn't get a photo of the finished cake, but I found this photo on Google Images and it's a good example of how to simply decorate it with the orange segments. |
Don't forget that you can print this (or any) recipe using the "Print Friendly" button at the foot of each post. It's a great little feature that allows you to remove any pictures (or any text that isn't relevant to the recipe) before printing. That can save on ink and paper & in today's economy, who doesn't want to save a little cash when you can?!


This sounds really good. I'll have to ask my mother to make one. The print friendly thing is very handy. Thanks.
ReplyDeleteAn almost 50-ish woman who loves to cook/bake and who believes in feeding the soul??? Oh, honey, we are kindred spirits!!! Happily following along ... :)
ReplyDeleteI love coming to your blog, but darn it, I'm always hungry when I leave it! lol Man, I'm craving that cake today. Hubs got Pineapple Upside Down Cheesecake the other day and although it didn't sound good, I snuck a bite and fell in LOVE. Now this......lol Thanks!
ReplyDeleteGeorge: I just found out about the print friendly feature myself. I'm glad you found it helpful. Are you sure you don't want to test your own baking skills on this one? I wouldn't want your mom cussing me out for posting it the whole time she was making it! LOL
ReplyDeleteYenta Mary: Welcome! Thanks for stopping in! I definitely agree that we're kindred spirits. I thought so the minute I saw your blog! I really look forward to getting to know each other better!
Cheri: Thanks sweetie! I'm sorry that I'm sending you away hungry! Wouldn't it be great if someone invented a way to click a key and have the food we read about just pop out of our hard drives?
Wait... I guess that wouldn't be such a good idea, would it? I'd be gi-normous in no time! Yeah, better scratch that. Hope all is well with you and yours!
This recipe looks great! We are having a Cake Off at work in two weeks..they all know my backing skills. With some practice, this recipe might be doable.
ReplyDeleteThis recipe sounds fantastic! I'll be trying it soon.
ReplyDeleteWhat a yummy looking cake! Thanks for visiting my blog - I'm following you now so I can keep up with your tasty offerings!
ReplyDeletehttp://beourbest.blogspot.com/
Wow that looks amazing! I'm definitely printing this one out, thanks for sharing it.
ReplyDeleteHugs & love,
Mimi
These look soooooooooooooooooo delicious!!
ReplyDeleteI told my mom that you would like her beignet recipe--she was elated, but wants to try another version that she thinks might be any better, which is hard to believe because the first batch was insanely yummy!