Friday, April 27, 2012

Oven Roasted Herbed Potatoes


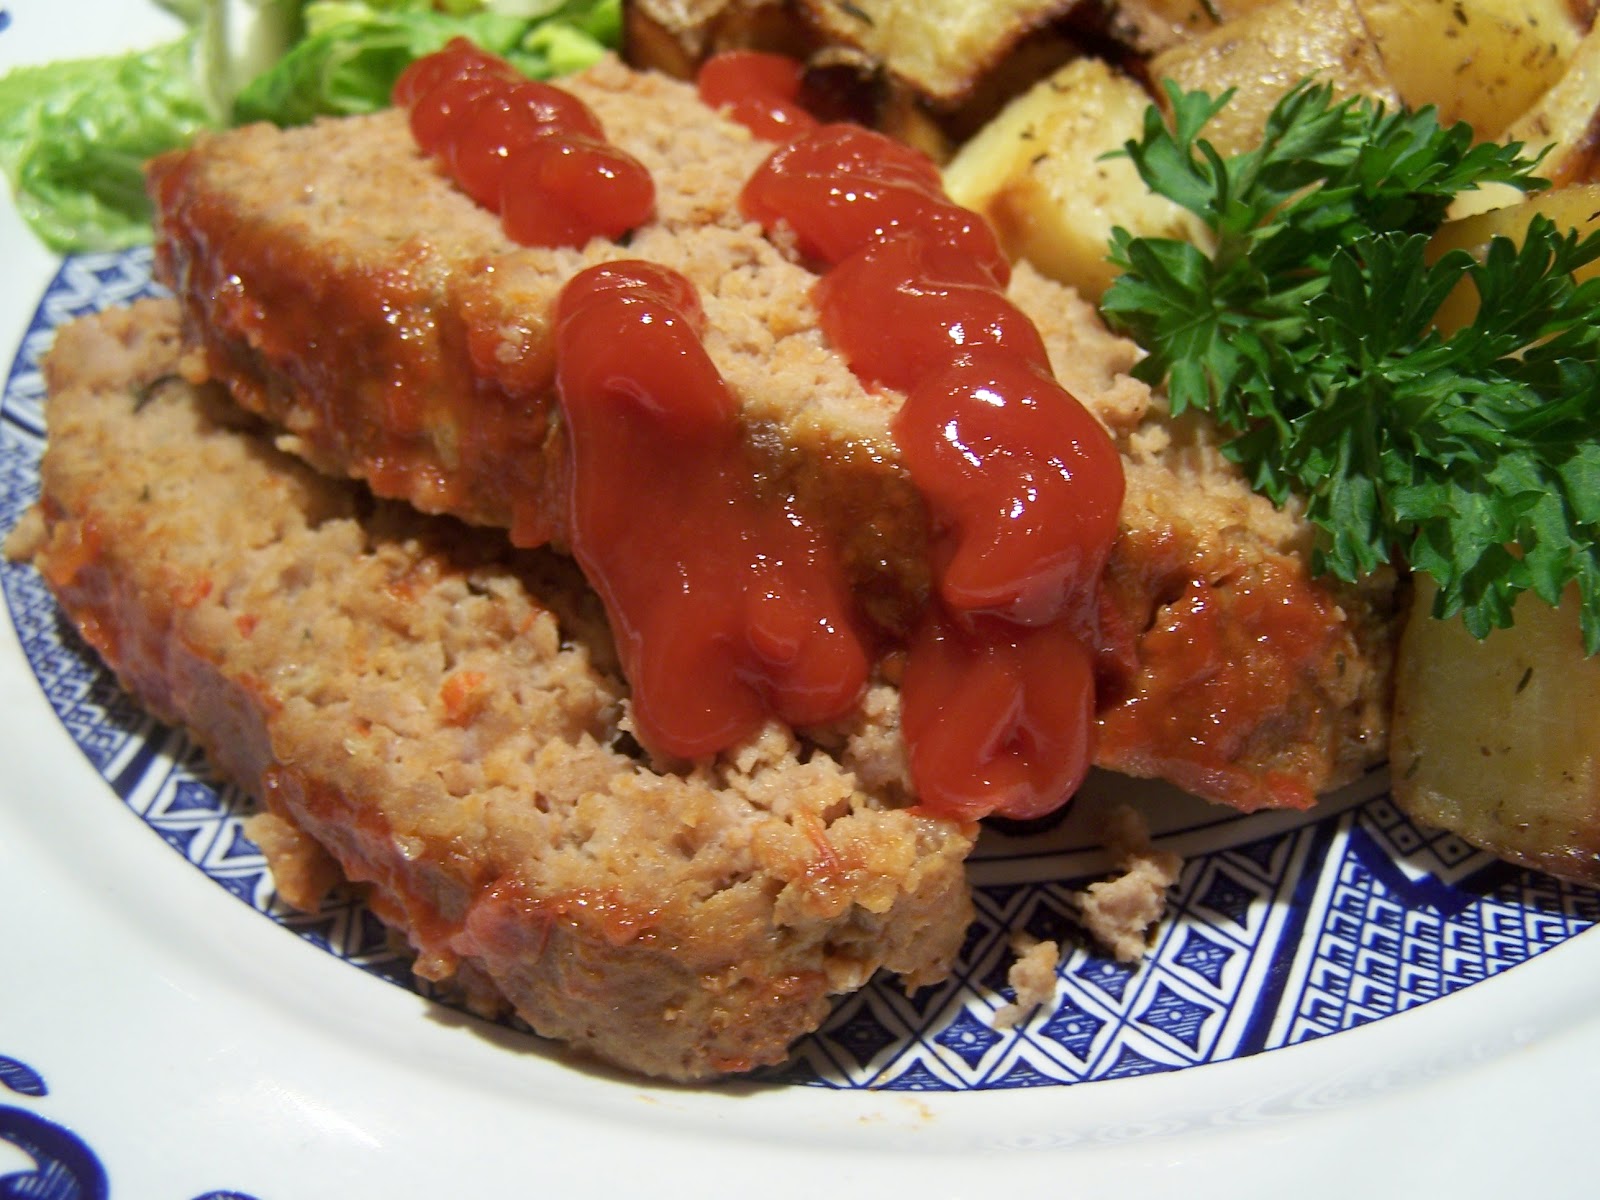
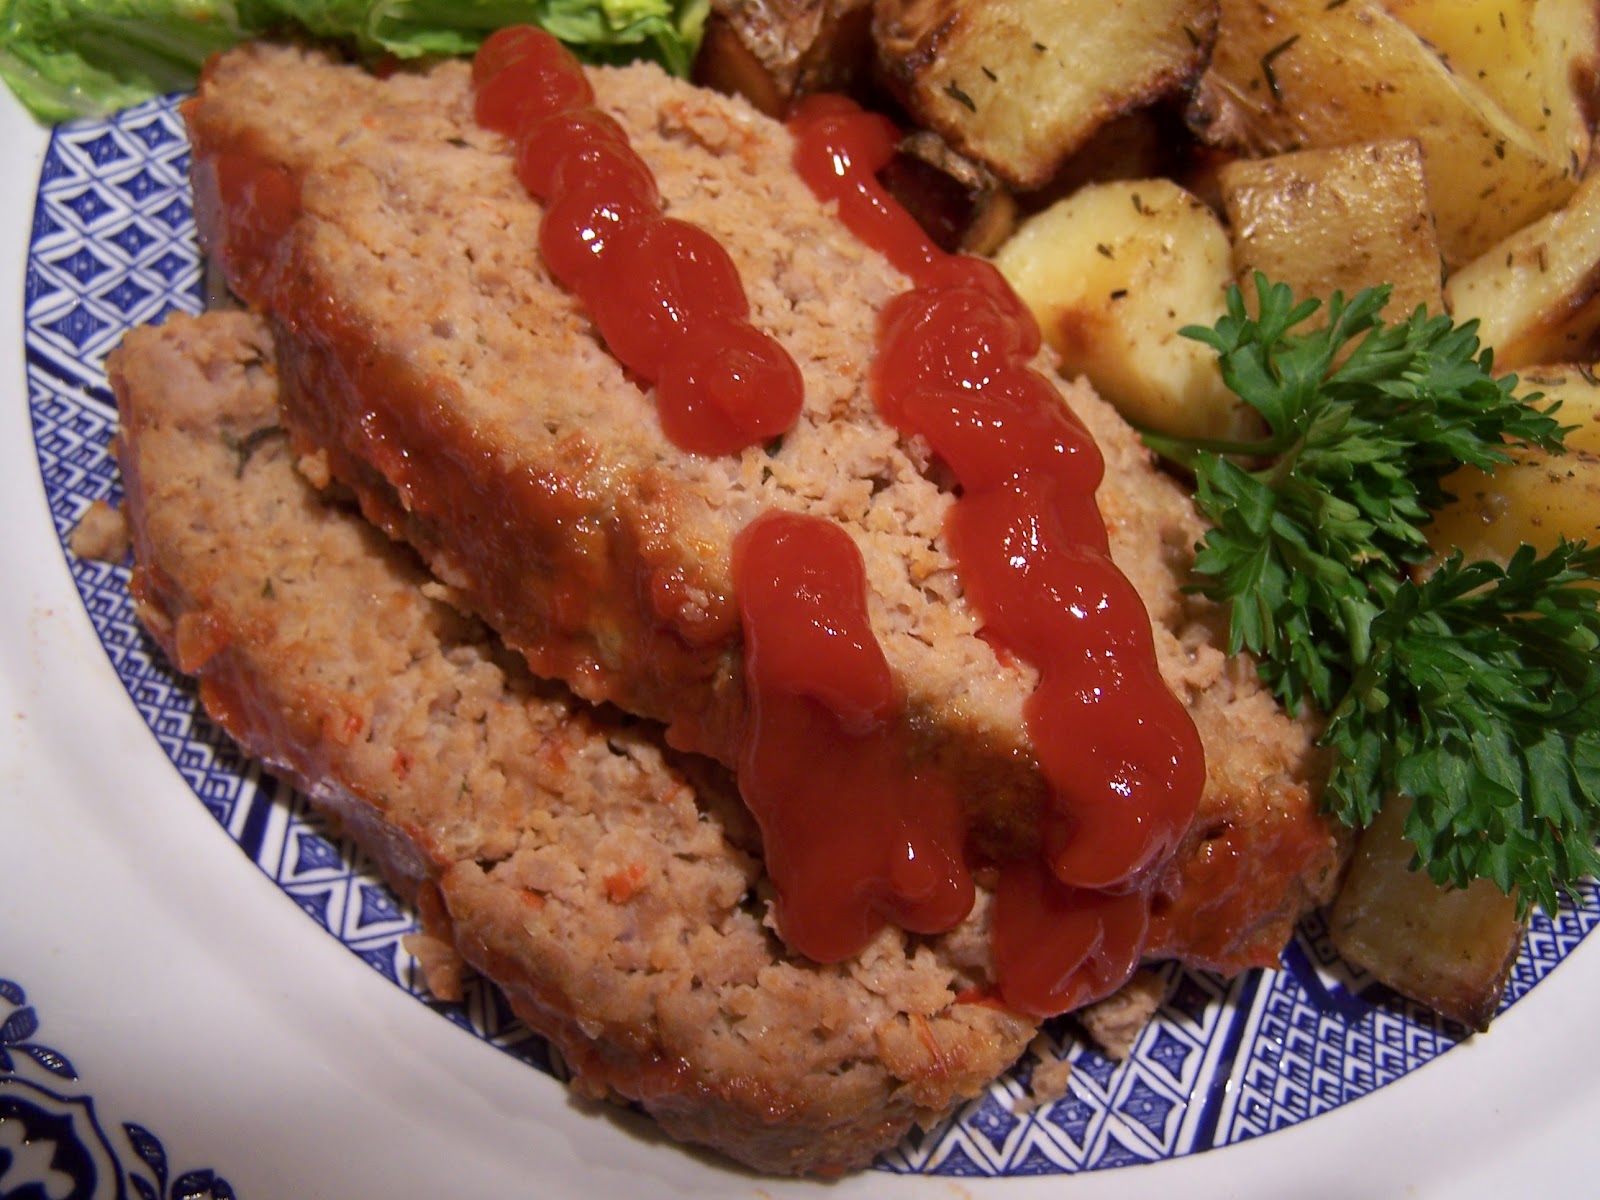
These are one of my daughter's favorites and the side that I prepared with the meatloaf that I made when she was home over Easter. I'd say they run pretty much neck and neck on her list with my twice baked potatoes. They're as simple to make as they are tasty and they come out crispy and golden brown on the outside and soft and fluffy on the inside.

Oven Roasted Herbed Potatoes
  • 3 to 4 Lbs Potatoes (I used Yukon Gold and Chef's White)
  • Extra Virgin Olive Oil
  • Dried Oregano
  • Dried Basil
  • Dried Thyme
  • Onion Powder
  • Garlic Powder
  • Kosher Salt & Fresh Ground Pepper


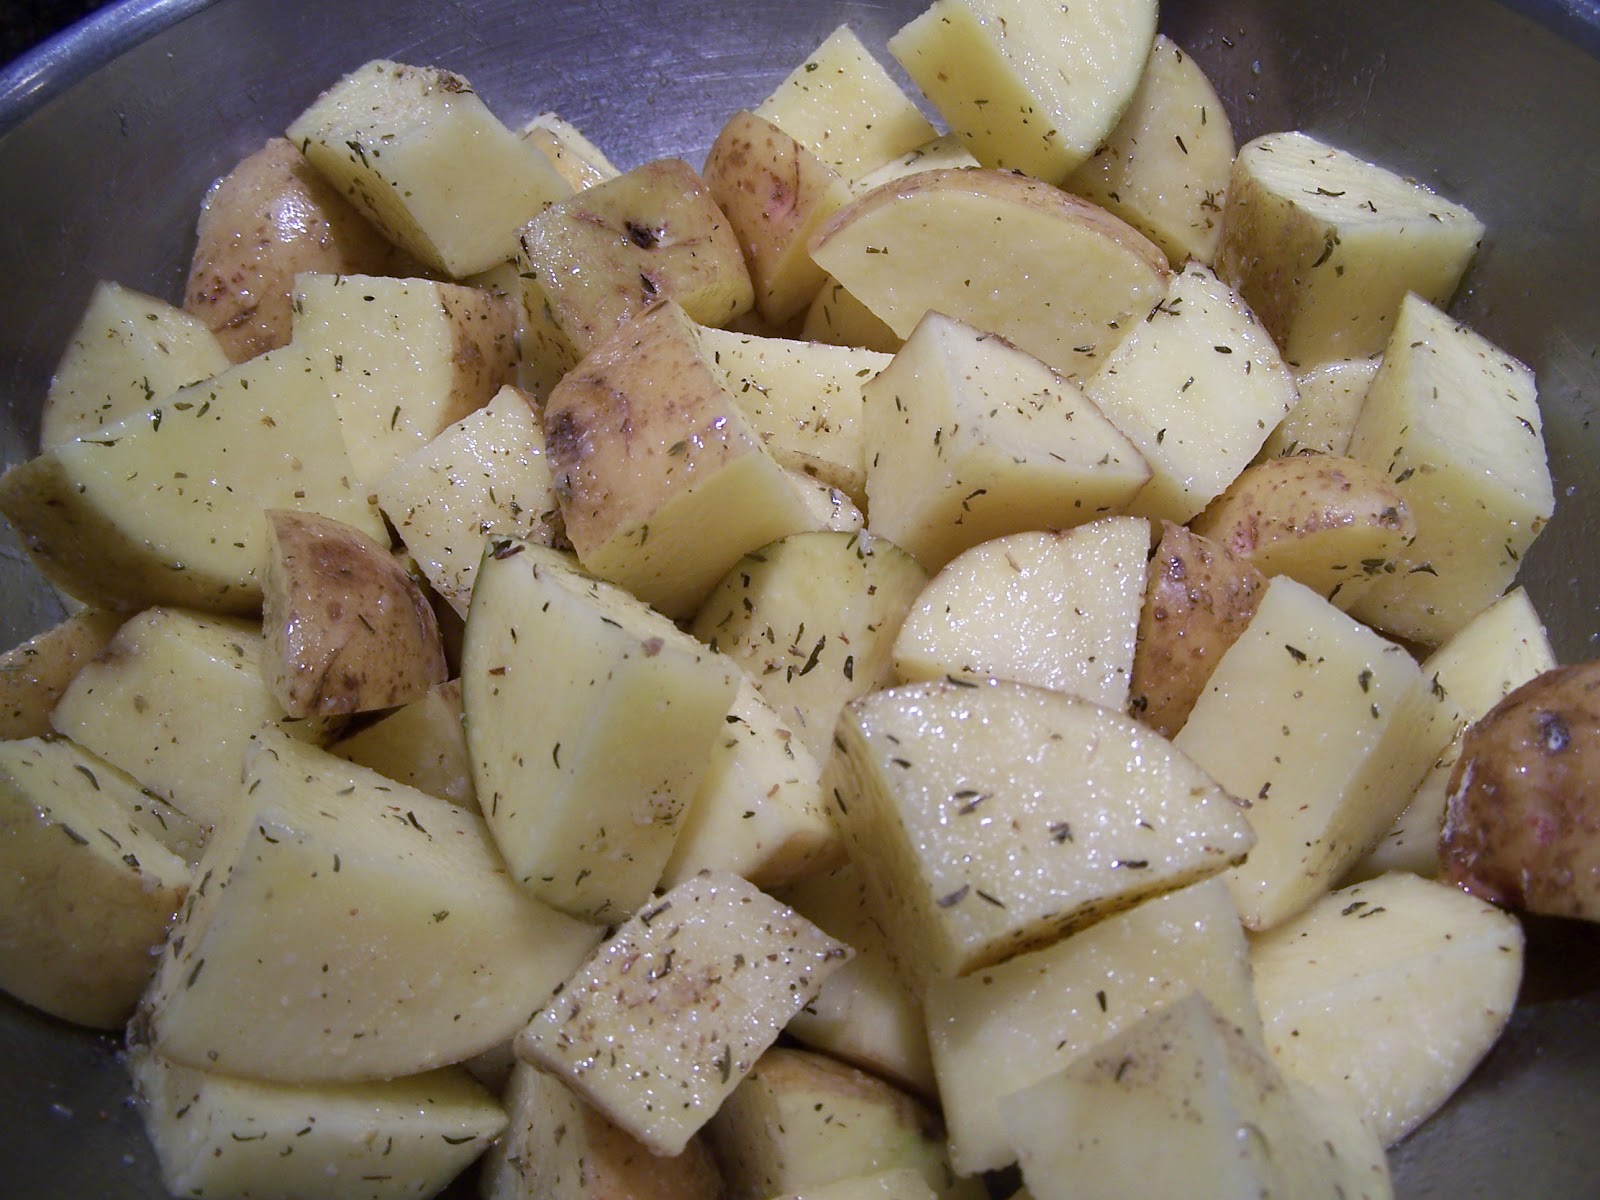
Pre-heat your oven to 425 degrees. Wash the potatoes under cold running water and pat dry with some paper toweling. Cut them into 1 and 1/2 to 2 inch cubes (approx) and put them in a large bowl. Just try to keep the pieces as close to the same size as possible, so they'll cook evenly.

Drizzle the potatoes with the olive oil and add your dried herbs, onion & garlic powder and a generous amount of salt & pepper. Toss well to coat the potatoes completely. I like to let them sit for about 15 to 20 minutes before I put them in the oven.

This is a very flexible recipe. You can add more oil and/or seasonings, or change up the herbs to whatever you like best. As much as I love fresh herbs and garlic, I prefer to use dried for this, because fresh herbs and garlic can burn at higher temperatures and become bitter. I'll also sometimes use equal parts olive oil and melted butter, if I'm feeling a little decadent.


Place the potatoes on a foil-lined baking sheet and roast them at 425 degrees for about 35 to 40 minutes, or until they are crisp and golden brown on the outside and fork tender on the inside. (it could take a little bit more or less time, depending on your oven and how large or small you cut them up) Use a baking sheet that's large enough to spread the potatoes out in a single layer. If your pan isn't large enough to do that, split them up and use two pans. I take them out and toss/flip them a couple of times during cooking, just to ensure even cooking and browning.


You can serve these potatoes with beef, pork, chicken, fish or even eggs. I always put out a few different condiments, because we all have our favorites. Some of the usuals are: sour cream, ketchup, ranch or bleu cheese dressing and malt vinegar.


Enjoy!


Don't Forget To Follow Me On Social Media! I Post Blog Updates, Ideas For Kitchen "How To's", Restaurant Recommendations And Reviews And Always Lots Of Photos!


You Can Have New Posts From Go Ahead Take A Bite Delivered Right To Your Inbox! Just Enter Your Email Address Here:


Delivered by FeedBurner
We will never send any advertising or provide your email address to any other blogs or businesses.

Don't forget that you can print this (or any) recipe using the "Print Friendly" button at the foot of each post. It's a great little feature that allows you to remove any pictures (or any text that isn't relevant to the recipe) before printing. That can save on ink and paper & in today's economy, who doesn't want to save a little cash when you can?!

Features


Yay!! My Baked Blueberry French Toast was featured at this week's Fridays Unfolded, hosted by the super cool Alison at Nancherrow!
(It seems that Alison no longer actively blogs at Nancherrow but she has a new site called "The Home School Collective" which can be found HERE )

And my Chocolate Chip Cookie Brownie Bars were featured this week at Tell Me Tuesday, hosted by the seriously sweet Ashley at Him & Her! (formerly known as Me & My 3 Boys)


And... My Sausage, Bell Pepper & Leek Strata was featured at the Month of Fun Linky Party for April, hosted by my fabulous fellow foodie, Erin at A Crafty Cook
(Erin also seems to have discontinued her blog, although it can still be accessed. She now runs an Etsy shop called Erin's Yarn Creations!)

Wednesday, April 25, 2012

Blogger/Captcha ALERT!!!


Just thought I'd let everyone know that there's an issue with word verification or "Captcha" in Blogger. If you are running into word verification on blogs where you never remember it being turned on before, it's probably not intentional.

I was totally unaware that my blog had "Captcha" on for , well... who knows how long. The only way that I found out was by going into my settings to do something else and I noticed that it was on. I haven't intentionally turned it on... EVER! I have turned mine off 3 times (so far) and it keeps resetting to on. I've been checking it every other day or so, to make sure it's off.

What's even more frustrating is that you can't see whether it's on or not when you leave a reply or make a comment on your own blog, because WV does not show up on Blogger blogs for the blog owner.

Apparently, it's happening to people who are using the new blogger interface. Changing back to the old interface seems to solve the problem for now, but Blogger is supposed to switch everyone over to the new interface at some point. I have no idea what will happen then.

"Mom's" Meatloaf


I know I've been posting a lot of recipes for the foods that I make when my daughter comes home for a visit, but that's one of the times when I tend to do more cooking. This last trip home also coincided with Easter, so that meant a lot more cooking than usual. I do have a new recipe coming up soon that I've made since her visit, so stay tuned! Now, on to the recipe for today.

Is there a more familiar meal to the average American family than one that includes some form of meat and potatoes? One of those hearty meals is definitely Meatloaf and it's usually accompanied by some form of potato side dish. Now, I know that meatloaf isn't necessarily just an "American" concept. It's origins date back to fancy meat terrines and pates that have been made in multiple cultures for centuries, but the one I'm posting today is the simple version that has graced the tables of American families for generations.

As it happened with most of the meals I prepared while the child was here, I didn't take a lot of step by step photos. But, I'm sure nobody's going to have any problems filling in the blanks. :~)

Mom's (that's me) Meatloaf
  • 2 Lbs Beef, Pork and Veal Mix (sometimes labeled "meatloaf mix")
  • 1 Med Yellow Onion, minced
  • 1/2 Lg Red Bell Pepper, minced
  • 1/2 Cup Seasoned Breadcrumbs
  • 2 Eggs
  • 2 Tbls Ketchup
  • 1-2 dashes Worcestershire Sauce
  • Kosher Salt & Fresh Ground Pepper, to taste
Glaze (optional)
  • 1/4 Cup Ketchup
  • 1 Tbls Yellow Mustard (heaping)
  • 1/4 Cup Packed Light Brown Sugar


Pre-heat the oven to 375 degrees. Mix all of the meatloaf ingredients in a large bowl until thoroughly combined. You can use just beef or turkey or whatever ground meat(s) you'd like to.

Combine all of the glaze ingredients in a small bowl or measuring cup and set it aside.


Pour the meat mixture into a baking dish or loaf pan and shape it accordingly. I bake mine in a large, oval, ceramic casserole dish and I form it into an oblong/football shape, making sure not to mound it too high in the center. The more level it is, the more evenly it cooks.

Bake the meatloaf, uncovered, for 40 to 50 minutes, depending on size/thickness. It could take up to an hour if it's baked in a high sided loaf pan. About halfway through the cooking process, I remove it from the oven, pour on the glaze and spread it evenly over the top.


When it's done, transfer the meatloaf to a heated platter and let it rest for about 5 minutes before slicing it. Since it's usually just the Hubbs and me for dinner, I'll just throw in a couple of baked potatoes along with it, or if I'm in the mood, I'll make mashed/smashed or twice baked. This time, I made oven roasted herbed potatoes (recipe to follow) because they just happen to be someone's favorites. Can you guess who? LOL Serve it with your favorite sides and enjoy!


**This serves 4 people (generously) with plenty left over for meatloaf sandwiches the next day. Yummm!  I still make the entire recipe when it's only the two of us. I just divide it in half and place the second loaf on a cookie sheet and put it in the freezer until it's frozen through. When it's completely frozen, I'll put the additional loaf in a large zip-top bag and pop it back into the freezer for another meal at a later time!


Don't Forget To Follow Me On Social Media! I Post Blog Updates, Ideas For Kitchen "How To's", Restaurant Recommendations And Reviews... And Always Lots Of Photos!


You Can Have New Posts From Go Ahead Take A Bite Delivered Right To Your Inbox! Just Enter Your Email Address Here:


Delivered by FeedBurner
We will never send any advertising or provide your email address to any other blogs or businesses.

Don't forget that you can print this (or any) recipe using the "Print Friendly" button at the foot of each post. It's a great little feature that allows you to save any recipe as a PDF, email a recipe to yourself (or a friend) and remove any pictures (or any text that isn't relevant to the recipe) before printing! That can save on ink and paper. Who doesn't want to save a little cash when you can?!


Friday, April 20, 2012

Chocolate Chip Cookie Brownie Bars


This is probably the most frequently made sweet treat in our house. I posted the recipe last year, but I made them again recently (for Easter) and I took more detailed, step by step photos this time.

Their humble beginnings were as a kind of happy accident for me about 5 or 6 years ago and they were such a big hit, that they've become one of my top 5 pot luck and party requests. The more I think about it.... let's change that to top 3.

I had several people coming over for a last minute cookout and I needed something to serve for dessert. I rarely use a box mix for simple baked goods like cakes, cookies or brownies, but I've definitely learned that they can make life a little easier, now that I'm not always feeling well. I had one box of brownie mix and one box of chocolate chip cookie mix (first boxed cookie mix that I'd ever bought, btw) and I was certain that neither one of them was going to make quite enough for the number of people that were coming.

I had almost scrapped the idea of making something homemade and was going to send Hubbs to the store to get something that I could pass off as my own, (OK, all of you Judgy Mc Judgers.... you know you've done that too) when I had a thought. Why not combine the two mixes in some way and pray my knees to the bone see what happens?  Et Voila! A classic was born!

(Sorry for the over exposed photos. I took these pics in a hurry, because my daughter was leaving to go back home and I needed to get them done in time for her to take some with her. They're another one of the items on her list of "food requests" when she comes home.)


Chocolate Chip Cookie Brownie Bars
  • 1 Box Ghirardelli Chocolate Chip Cookie Mix
  • 1/4 Lb Butter (1 Stick), softened
  • 1 Lg Egg, lightly beaten
  • 1 Box Ghirardelli Double Chocolate Brownie Mix
  • 1 Lg Egg
  • 1/3 Cup Vegetable Oil
  • 1/3 Cup Water

Pre-heat your oven to 350 degrees. 


In a large mixing bowl, combine cookie mix and softened butter with a pastry cutter or fork until you get pea sized pieces. (as you would for most pie crusts, etc.)


Add in the lightly beaten egg and continue to mix with the pastry cutter so that you have chunks of dough.  Do not combine it thoroughly, the way you normally would with a cookie dough.


In another mixing bowl, prepare the brownie batter according to the package instructions.


Loosely layer the cookie dough "crumbles" in the bottom of a 13x9x2 baking dish and then pour the brownie batter over the top, spreading it out towards the edges of the pan. It's perfectly OK if there are areas where the cookie dough isn't fully covered.  (Depending on the humidity in your house/area and the actual size of the "large" eggs that you get, the volume of each dough/batter can vary. I find that more often than not, the eggs that are sold in my area as "large" are generally more like "medium" eggs.) I wouldn't suggest doubling the egg in those cases, though. It all works itself out just fine.


Bake the bars at 350 degrees for 35 to 38 minutes, but depending on your oven, it may take more or less time. I would start checking them at 30 minutes, just to be safe. You want them to be just barely set in the center when you take them out. Unlike certain parts of my arms that will soon be exposed in summer clothes, a little bit jiggly is actually a good thing. ;~)


So, just as it was with the rest of my Easter brunch offerings, I didn't get a photo of these before they were cut, because the vultures my lovely family members were diving head first into them, before I was even done putting all of the food out on the buffet table.

As with all rich, gooey chocolate confections, a glass of ice cold milk is really all that you need to accompany these, but you can serve them in any number of ways, with all kinds of yummy additions. Vanilla bean ice cream, chocolate or hot fudge sauce and whipped cream, are just a few possibilities that come to mind at the moment. Your imagination is your only limitation!  Enjoy!

▓▓▓▓▓▓▓▓▓▓▓▓▓▓▓▓▓▓▓▓▓▓▓▓▓▓▓▓▓▓▓▓▓▓▓▓▓▓▓▓▓▓▓

Holy Moly! I just found out that my Asparagus and Bacon Quiche was featured last week, at the Fridays Unfolded party, hosted by the super sweet Alison at Stuff and Nonsense! (I didn't have the chance to link up last week and totally missed it.)

Yay! My Baked Blueberry French Toast was featured at Show & Tell with Mrs Hines, hosted by the very lovely Sharon at Mrs Hines' Class.

And... it was also featured at Inspire Me Monday, hosted by the always sweet (and far too kind) Ramona at Create With Joy!

Geese Louise! It seems that there must be a whole lot of blueberry fans out there! Just found out the Blueberry French Toast was also featured by the always sunny "D" on her Sunday Porch Parade and Pinterest Gallery over at The Shady Porch.
And.... It was just featured at this weeks Toot Your Horn Tuesday, hosted by the ever creative and crafty Debbie at Debbie Does Creations.

I sure hope you all get a chance to pop in and pay a visit to all of these lovely ladies and their incredibly fun and inspiring blogs. Just click on any of the links above. I promise that you'll be very glad that you did!


You Can Have New Posts From Go Ahead Take A Bite Delivered Right To Your Inbox! Just Enter Your Email Address Here:


Delivered by FeedBurner
We will never send any advertising or provide your email address to any other blogs or businesses.

Don't forget that you can print this (or any) recipe using the "Print Friendly" button at the foot of each post. It's a great little feature that allows you to remove any pictures (or any text that isn't relevant to the recipe) before printing. That can save on ink and paper & in today's economy, who doesn't want to save a little cash when you can?!

Monday, April 16, 2012

Oven Baked Blueberry French Toast


Good Monday morning everyone! I'm just coming out of a week-long GI bug and obviously haven't been doing any cooking, so I thought I'd share one more of the dishes that I made for Easter brunch this year. It's inspired a little bit by a bread pudding recipe that I've made forever and a recipe that I found this year at the Stonewall Kitchen blog. I've made this with raspberries, peaches and sauteed cinnamon apples in the past as well, but no matter what kind of fruit I use, it always disappears off the brunch table in a matter of minutes. I think I'm going to have to start making more than one from now on...

Oven Baked Blueberry French Toast
  • 1 Loaf Challah or Brioche (egg bread)
  • 1 Pint Fresh Blueberries, rinsed & drained
  • 8-10 Lg Eggs
  • 2 Cups Milk
  • 1/2 Cup Butter, melted
  • 2 Tsp Cinnamon
  • 2 Tbls Granulated Sugar
  • More Cinnamon and Sugar for the top
  • Pure Maple Syrup, for serving


Pre-heat your oven to 350 degrees F.

Rinse and drain the blueberries and cut your bread into 1/2 inch slices.


In a rectangular baking dish or large loaf pan, layer the bread slices in a slightly upright position, sprinkling the blueberries in between and on top of the layers.


Drizzle the melted butter evenly over the top, making sure to get a little in between the slices of bread too.


In a large bowl, mix the eggs, milk, 2 tablespoons of sugar and 2 teaspoons of cinnamon with a whisk or a fork until it's well combined.


Pour the egg (custard) mixture over the bread and fruit and lightly press down on the bread with a spatula or the back of a spoon, so that it can soak up a good amount of the liquid. This can all be done just prior to baking or the night before and then baked off in the morning. If you do it the night before, just cover the dish tightly with cling wrap or a very tight fitting lid and pop it in the fridge.


Just before baking, sprinkle the top with a couple of teaspoons of sugar and a few shakes of cinnamon.


Bake in a pre-heated 350-degree oven for 30 to 40 minutes, depending on your oven and whether or not it goes in cold right out of the fridge. It's done when the center is set and the top is crispy and golden brown. (Sorry that I wasn't able to get any photos of the whole finished dish, but the vultures my family swooped in and filled their plates before I was even able to put all of the food out on the table.)


Serve this with warmed, pure maple syrup and if you want to be a little decadent, you can also add a big dollop of sweetened, freshly whipped cream and a few more fresh blueberries.   Enjoy!

Love all things Blueberry? Try my Meyer Lemon Blueberry Shortcake!

Find the recipe HERE


Don't Forget To Follow Me On Social Media! I Post Blog Updates, Ideas For Kitchen "How To's", Restaurant Recommendations And Reviews... And Always Lots Of Photos!


You Can Have New Posts From Go Ahead Take A Bite Delivered Right To Your Inbox! Just Enter Your Email Address Here:


Delivered by FeedBurner
We will never send any advertising or provide your email address to any other blogs or businesses.

Don't forget that you can print this (or any) recipe using the "Print Friendly" button at the foot of each post. It's a great little feature that allows you to remove any pictures (or any text that isn't relevant to the recipe) before printing. That can save on ink and paper & in today's economy, who doesn't want to save a little cash when you can?!

~~~~~~~~~~~~~~~~~~~~~~~~~~~~~~~~~~~~~~~~~


Wow! My Creamy Pinto-Cado Dip was featured this week on Masterpiece Monday at California Coastal Living, hosted by the very lovely Mary!


And... it was also featured this week on the Wednesday Whatsits party at White Lights On Wednesday, hosted by the very cool Ms. Julie!


_______________________________________________________
*******************************************************

I also just found out that my Sweet Buttermilk Banana Cake was featured on Terrific Tuesdays, at Adventures of A DIY Mom, hosted by supermom Rachel!  (I'm so sorry that I missed it when it was posted as a feature on the 3rd of this month. I have got to get my act together! LOL)


I am just so honored and humbled... Two of my recipes (Pinto-Cado Dip and Sausage Strata) were featured this week on Thriving On Thursdays, at Domesblissity, hosted by the very sweet and thrifty Ms. Anne! 

(The last I checked Anne's blog was under reconstruction, but you can visit her Facebook page HERE!)


A very sincere Thank You! to all of these gracious hostesses!


Related Posts Plugin for WordPress, Blogger...