Saturday, April 27, 2013

Ultimate Margarita Chicken With Tequila Lime Vinaigrette (In The Oven!)


The hubbers and I have consumed a Margarita or two in our day... I mean, for folks who enjoy a cocktail every day now and then, who doesn't love the idea of an icy cold, fruity, sweet, yet tart and slightly salty beverage on a hot summer night? (or day) Well, if you happen to be one of those people, then a Margarita is the total package. It also happens to be a particularly popular libation around the 5th of May; also known as Cinco de Mayo.

Since man (and/or woman) cannot live on alcohol-based beverages alone, I thought it'd be kinda fun to merge this much loved seasonal drink with one of my favorite foods. If you know me at all, then you have a pretty good idea of what that food is, but for those of you stopping by for the first time, I'll fill you in. It's chicken! Yup. I'm a bona fide, die-hard, lifelong, card-carrying chicken-holic. Trust me, if you spend even a little bit of time poking around here, you'll get plenty of proof.

So, how did this little culinary experiment turn out? Well, it's definitely a keeper, if I do say so myself.  And I'm not just basing that on my own opinion. Hubbers loved it. I can tell pretty quickly when I have a winning recipe on my hands, by of the sounds that he makes while he's eating. It's kinda like the soundtrack to a... hmmm, well... let's just say a certain genre of films that they keep in the back room at the video store. Not that I'd know anything about that, of course.


Ultimate Margarita Chicken
For the Marinade:
  • 4 - 6 Bone-In (Split) Chicken Breasts
  • 1/4 Cup Tequila
  • 1/4 Cup Orange Juice
  • Juice of 1 Lime
  • Zest of 1 Lime
  • 1/4 Cup Light Olive or Vegetable Oil
  • Salt and Pepper

Pre-heat the oven to 375° F

Prepare the marinade by mixing together the tequila, orange juice, lime juice, lime zest, oil and salt and pepper.


Before we go any further, I'll let you in on a little secret for marinating meats and poultry: I didn't invent this little gem. Professional chefs have been doing it for... well, ever. My mom used to do pretty much the same thing with a fork when she would marinate flank steak. I'd completely forgotten this until I stumbled across a video on YouTube a few years ago and I've been doing my own version ever since. It's all about "piercing" the meat before seasoning it. The pros generally use a special little multi-bladed gadget, (I've included a short video at the end of this post, where Chef Steve Binks demonstrates) but you can accomplish the same thing by using the tip of a sharp paring knife to make small slits all over the chicken. Yeah, it's really that simple.

Simple and brilliant. Of course, it's up to you, but you really shouldn't skip this step, because it can make a world of difference in your finished dish. You'll end up with chicken (or steak or chops) that is extremely tender and juicy and full of the flavors from whatever marinade you're using. Just give it a try with this recipe and I'm pretty positive that you'll continue to use this method from now on.


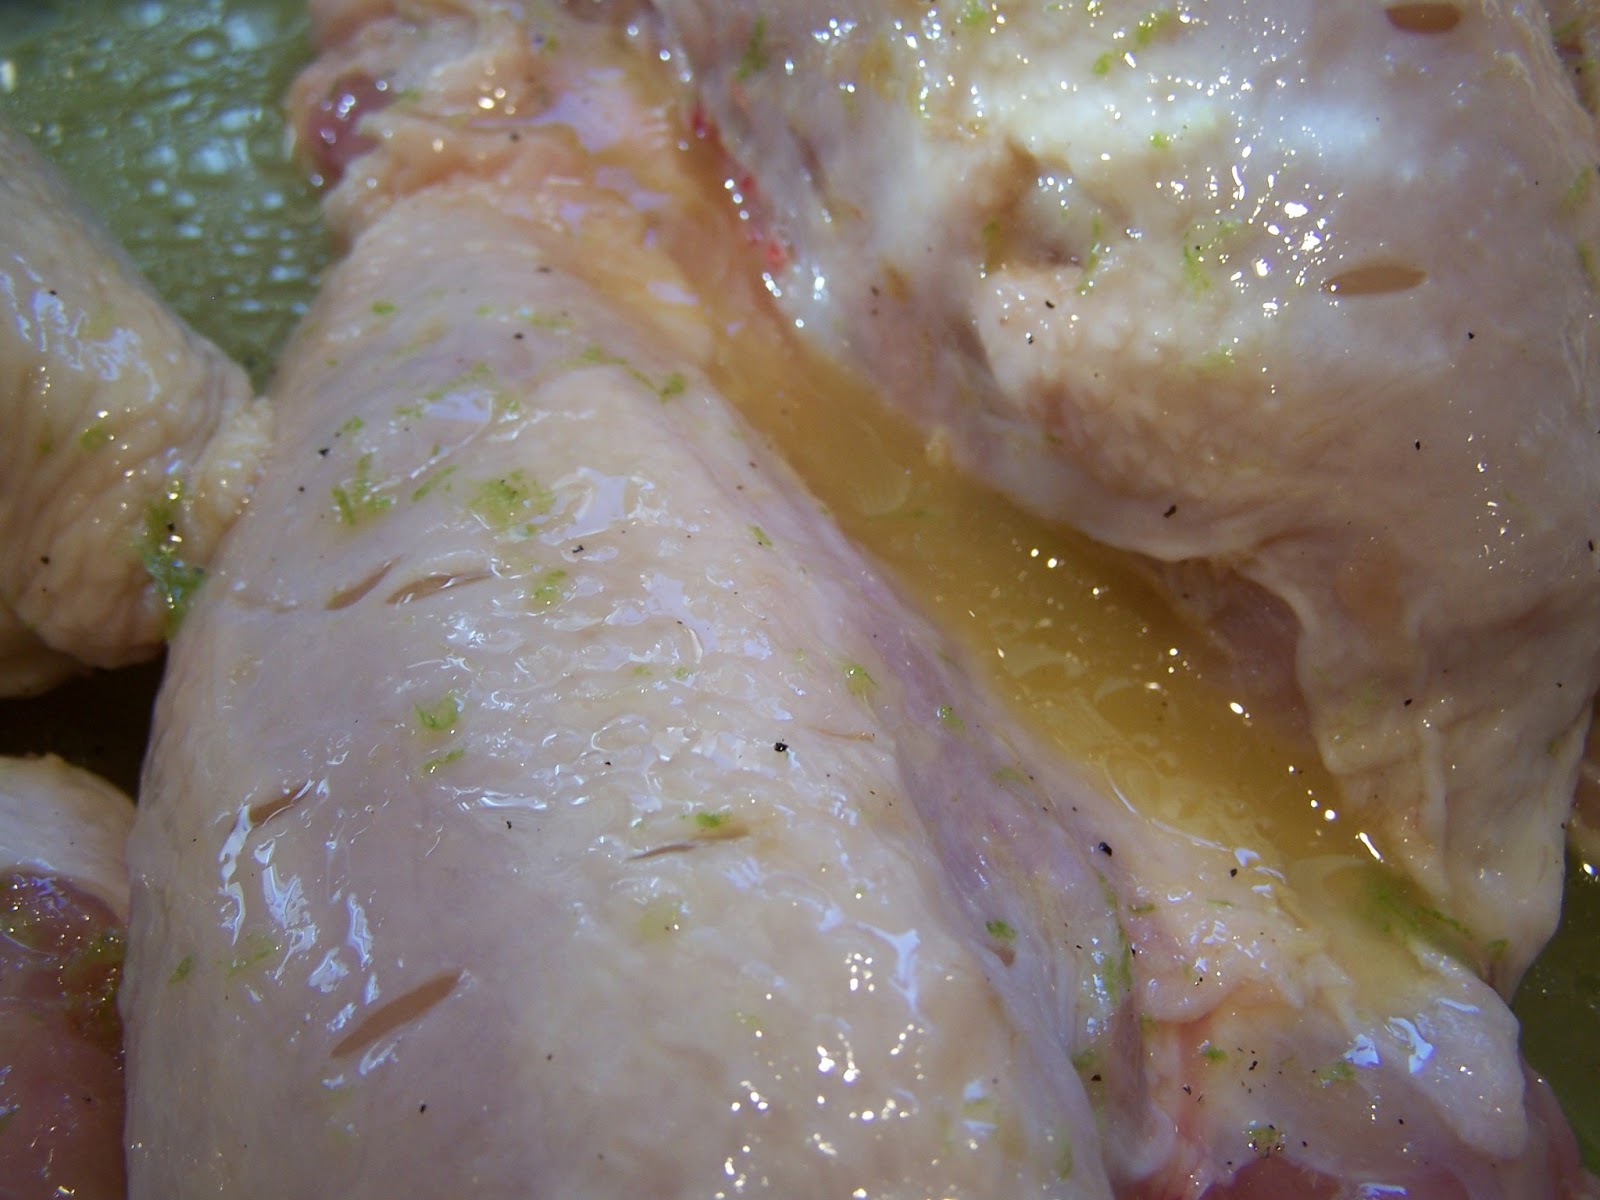
When using bone-in chicken, (breasts, thighs and drumsticks) you can pierce the meat all the way to the bone. Although I would not recommend using the boneless version for this particular recipe, I do pierce boneless cuts of chicken, beef, pork, etc. prior to marinating. I just make slightly more shallow slits (about halfway through) on both sides of the meat.


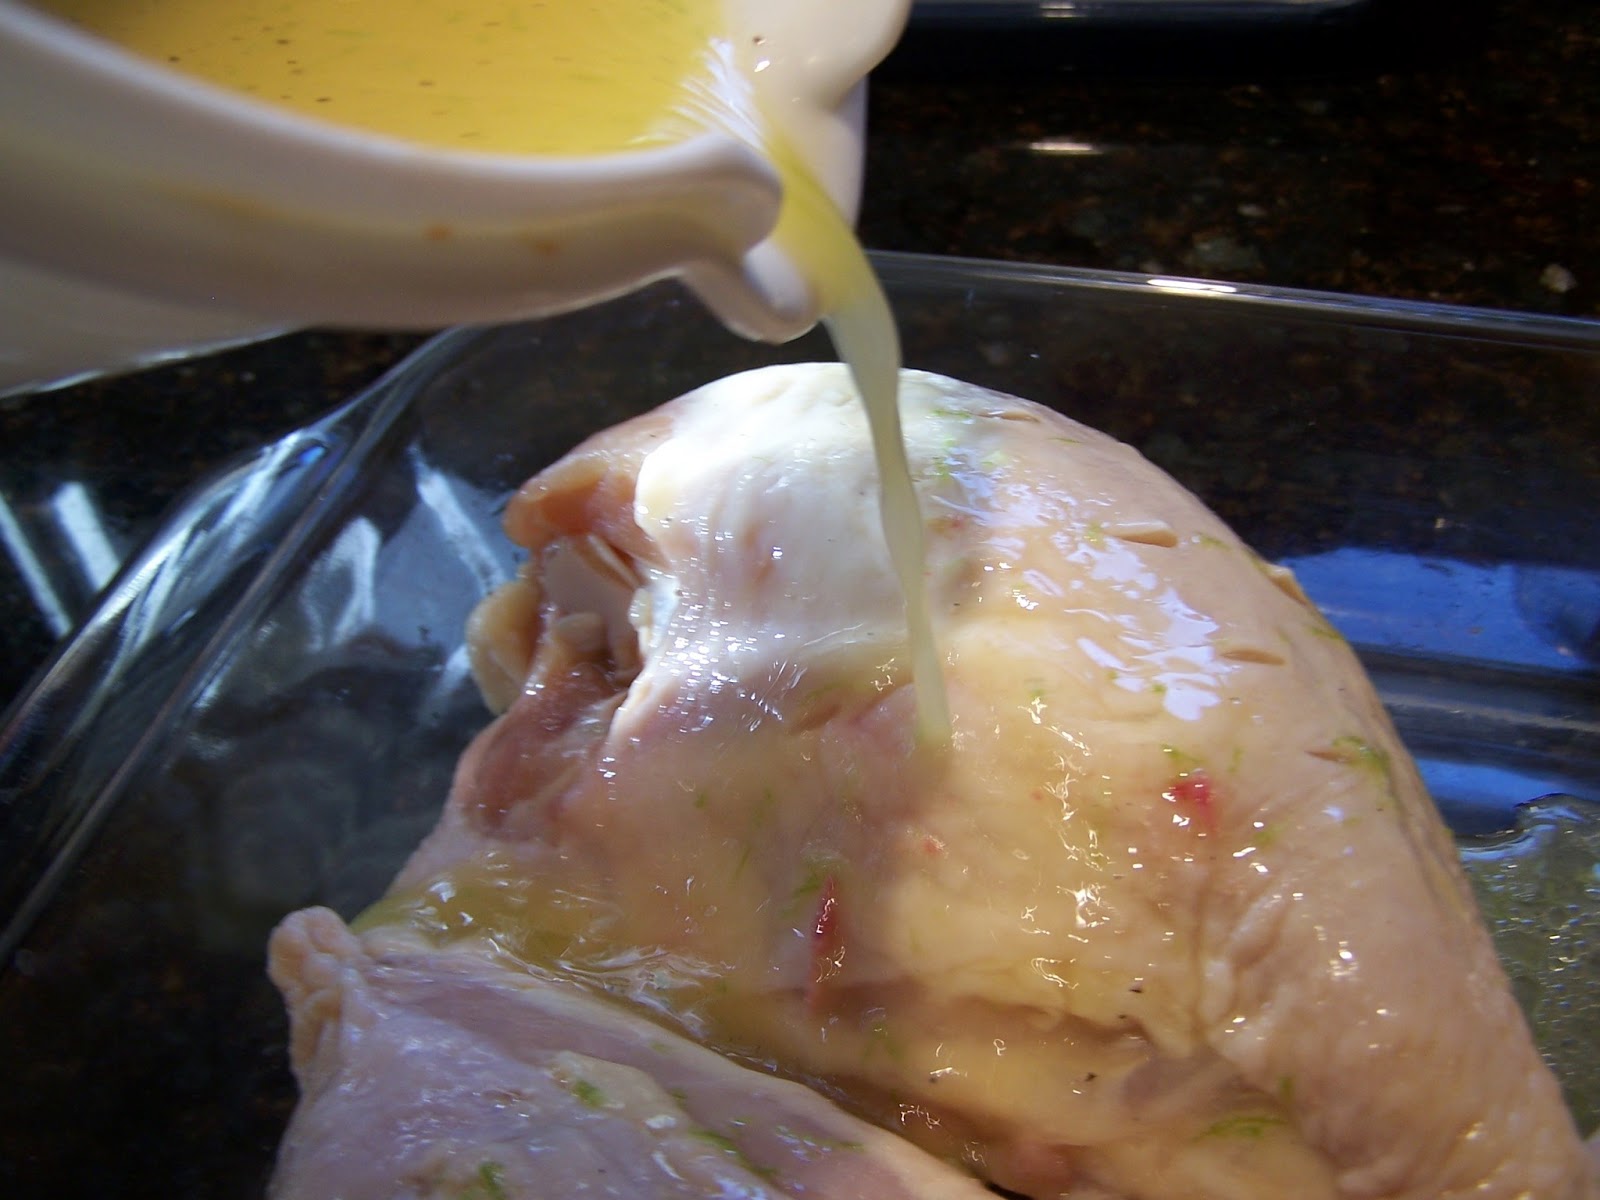
Place the chicken in a 2 or 3 inch deep, glass or ceramic baking pan or casserole dish. Stay away from metal pans or bowls when using citrus based marinades. The citric acid tends to react with most metals and will give the meat a funky, metallic taste. With the exception of stainless steel, it can also corrode the pan.


Pour the marinade slowly over the meat, so that plenty of it gets down into those slits you've made.


Once you've got all of the marinade in the pan, turn the meat over two or three times, ending with the skin side down in the marinade. Cover the dish with some plastic cling wrap and refrigerate it for a minimum of 30 minutes, but no longer than about an hour. The citric acid in fruit juices breaks down the fibers in the meat and if you leave it in too long, it will make the meat mushy. I don't know about you, but in my book, mushy chicken (or any other meat) is not very appetizing. That's why I avoid buying the "pre-marinated" meats that you often find in the grocery store butcher case. 


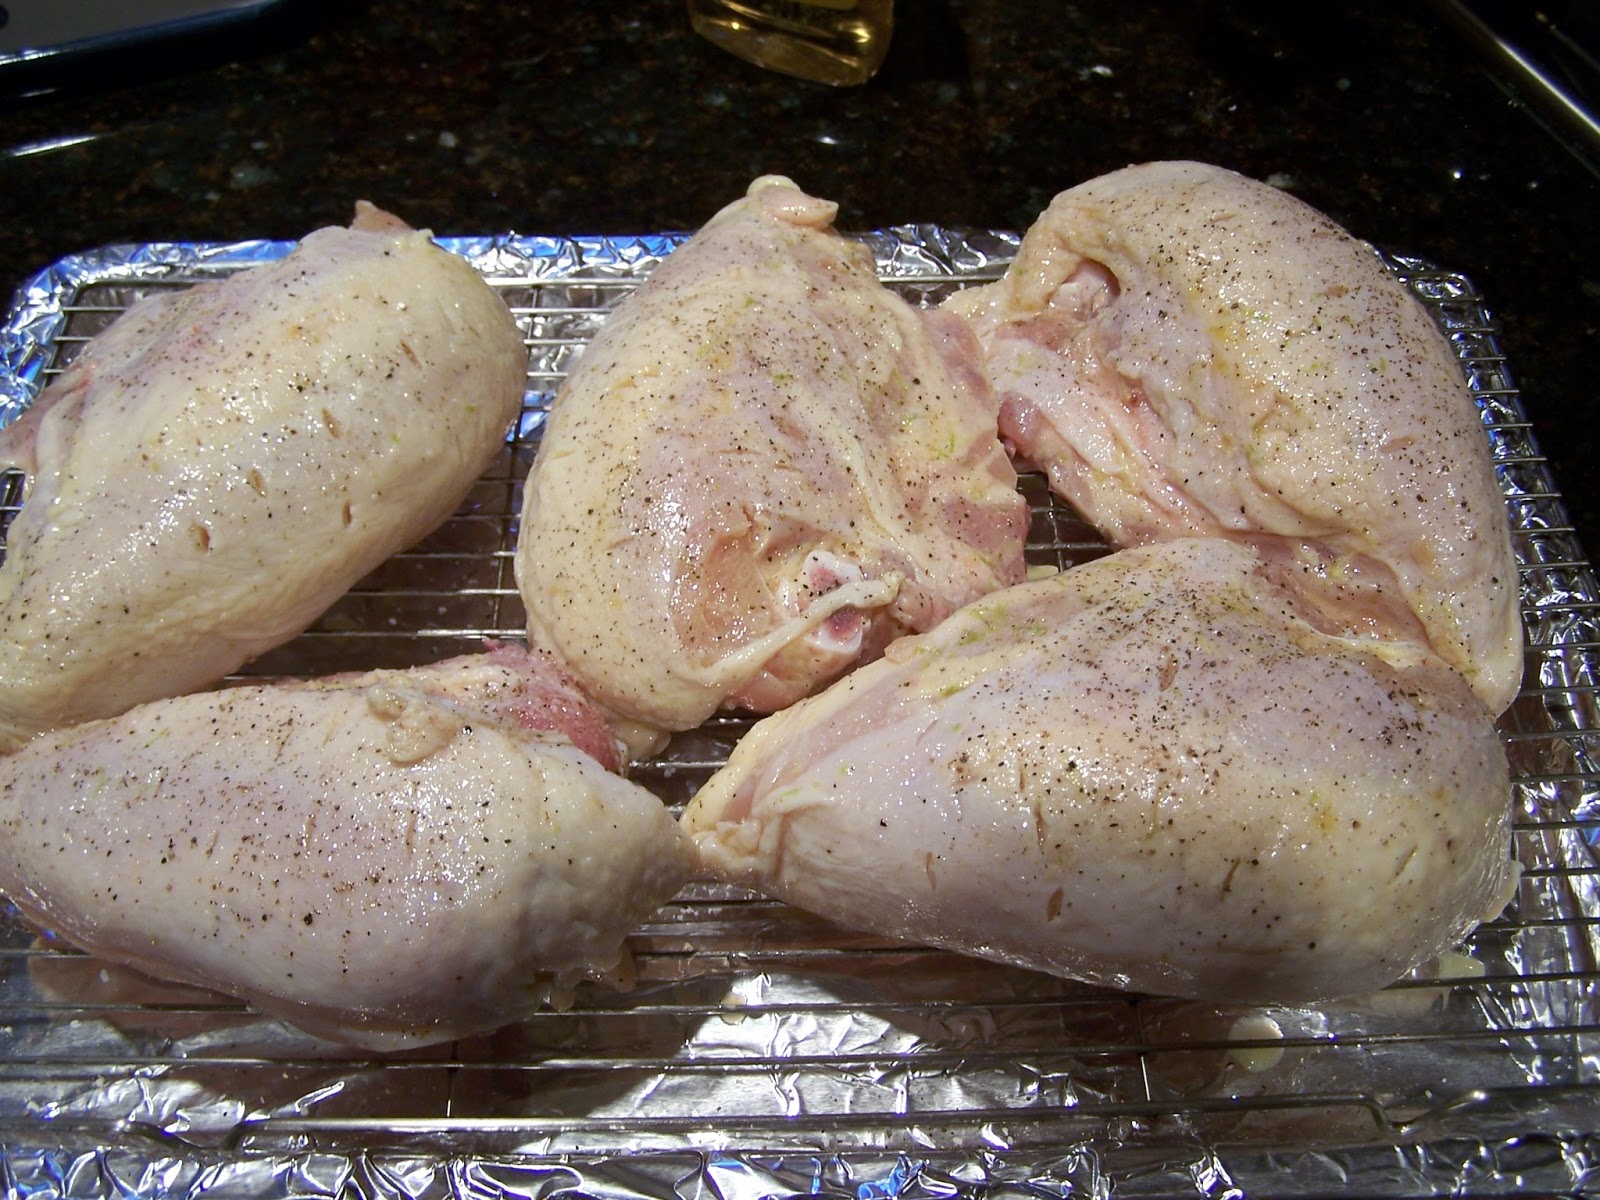
When the chicken has finished marinating, remove it from the fridge and let it sit at room temperature for a maximum of about 10 minutes. When meats like beef and lamb are coming fresh from the fridge, you want to bring them up to almost room temperature before grilling or roasting them, but poultry and pork can start to "turn" when they get too warm, while still in their raw state. Discard any remaining marinade.

Place the chicken pieces on a rack, placed over a foil-lined sheet pan or broiler pan. Roast it in the oven for 30 to 40 minutes. (depending on your oven and the size of the chicken pieces) Check on it at about the 30-minute mark and if the internal temperature is 165 degrees and the juices run clear, it's done. The days of cooking chicken until it's shriveled up and bone dry are over, folks. Meats continue to cook for several minutes after being removed from the heat source and their internal temperature will rise (up to 5 degrees) as it rests.

While the chicken is cooking, make the vinaigrette.


Tequila Lime Vinaigrette
  • 1/4 Cup Tequila
  • Juice of 1 Lime
  • Zest of 1 Lime
  • 1 Tbls Honey (heaping)
  • 1 Lg Shallot, minced
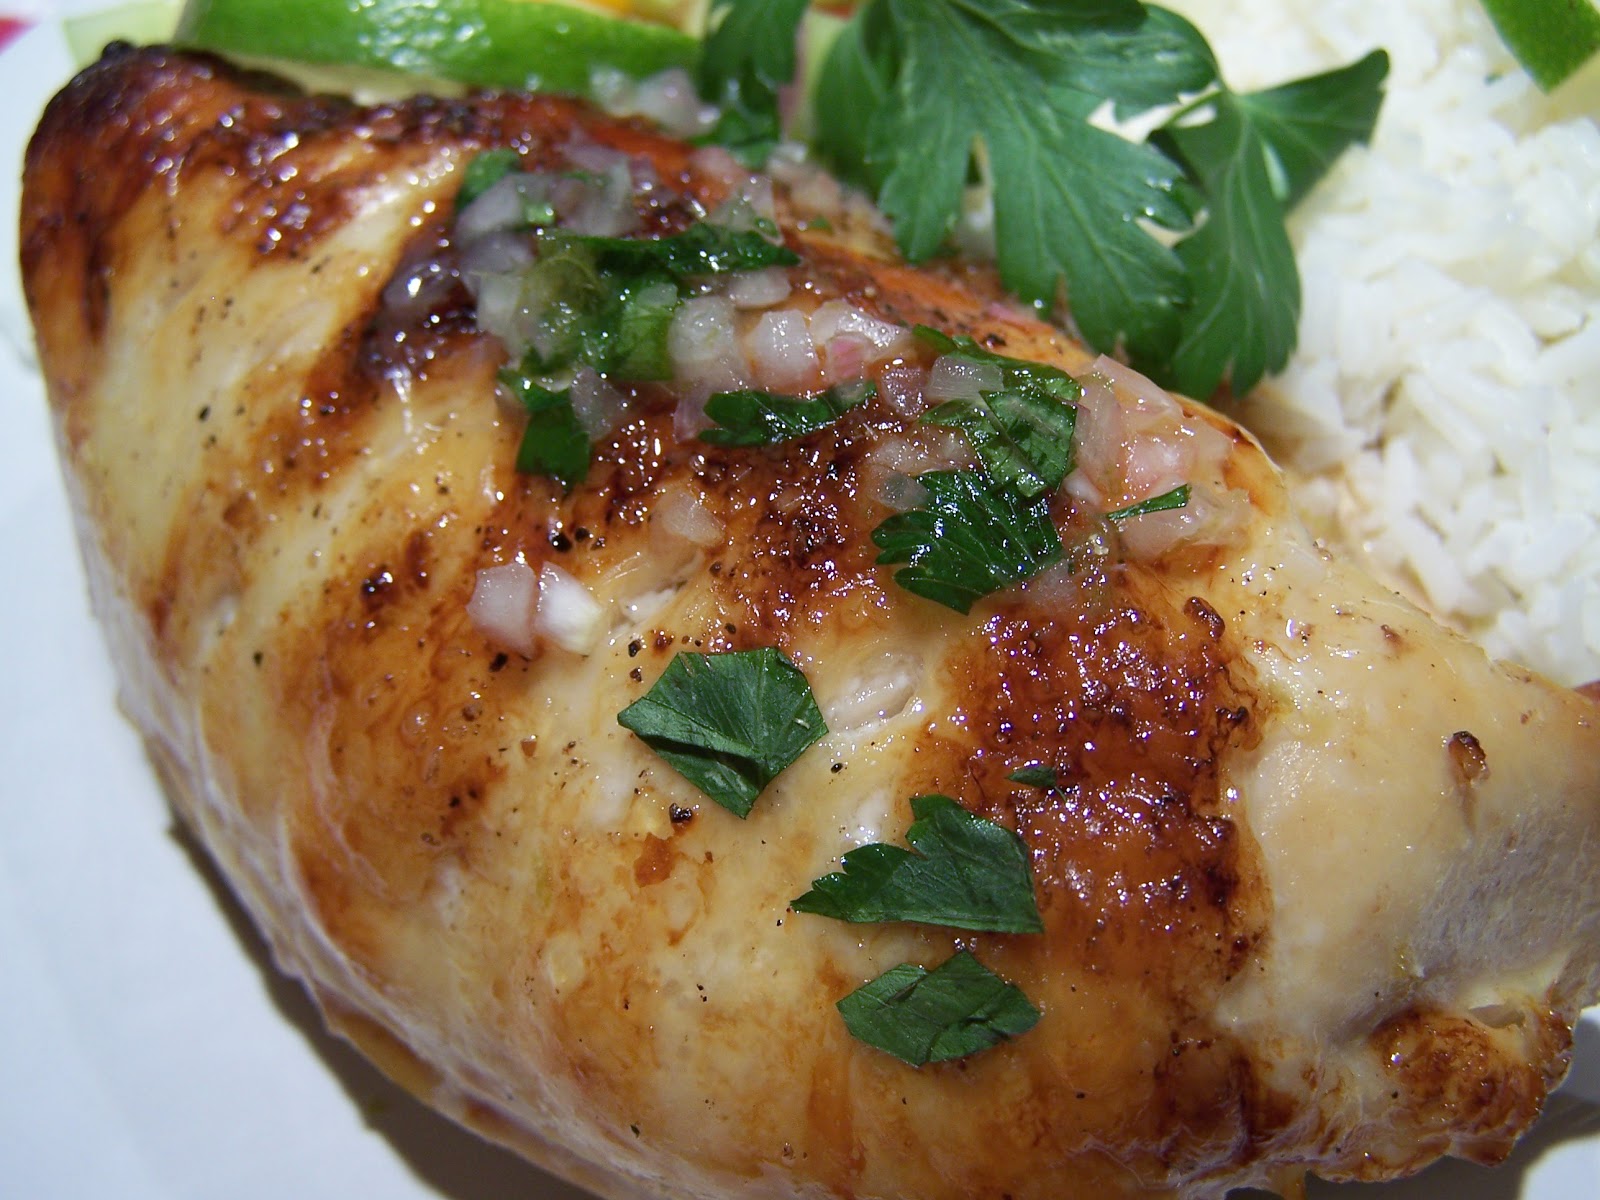
  • Fresh Flat Leaf Parsley, chopped
  • 1/4 Cup Light Olive or Vegetable Oil
  • Salt and Pepper


This looks like a lot of shallots, but it's really not. They just float to the top.
Place all of the ingredients in a small mixing bowl and whisk to combine. You can also use a stick blender or put them in a blender or food processor if you want the vinaigrette to be more smooth. If the kiddies will be joining you for this meal, you can leave the tequila out of the vinaigrette or make a separate batch without it for them. The tequila in the marinade will be fine. The alcohol burns off during the cooking process.

You might have noticed that the ingredients in the marinade and the vinaigrette are almost identical ...and they are. Almost.

I used orange juice in the marinade, because honey is very thick and contains more natural sugar. This would have made the skin on the chicken more likely to burn. The orange juice added a perfect balance of sweetness, without the risk of charring the skin before the meat was cooked through.


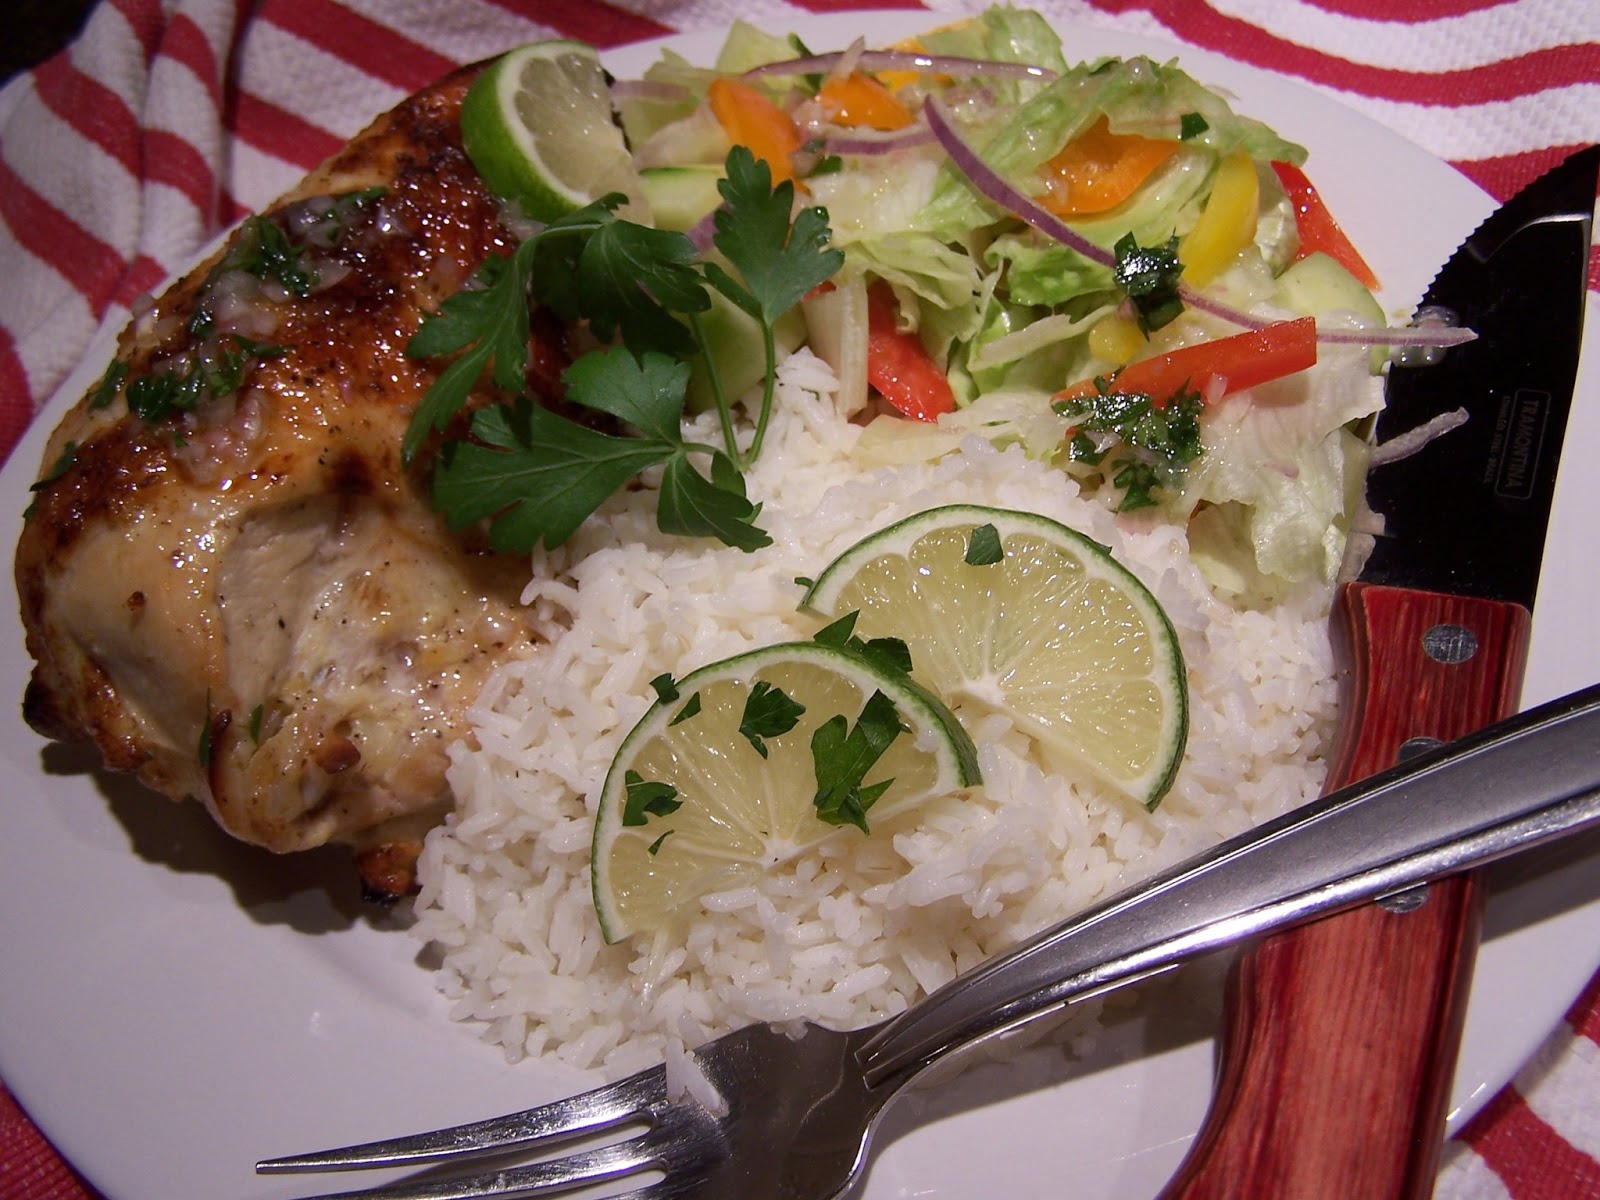
I served this zesty chicken with a crisp green salad and some Jasmati rice that I prepared "Chipotle Grill" style. We love their rice, so I asked one day when we were in there, just what it is that they do to give it such a bright, fresh flavor. It couldn't be any easier.

Just cook your rice as you normally would ( **I make mine in the microwave) and when it's done and you're ready to fluff it up with a fork, just squeeze in some fresh lime juice, add some chopped cilantro and continue to fluff. And voila! You have Chipotle's Cilantro Lime Rice! (I didn't have any fresh cilantro on hand, so I used flat leaf parsley this time)


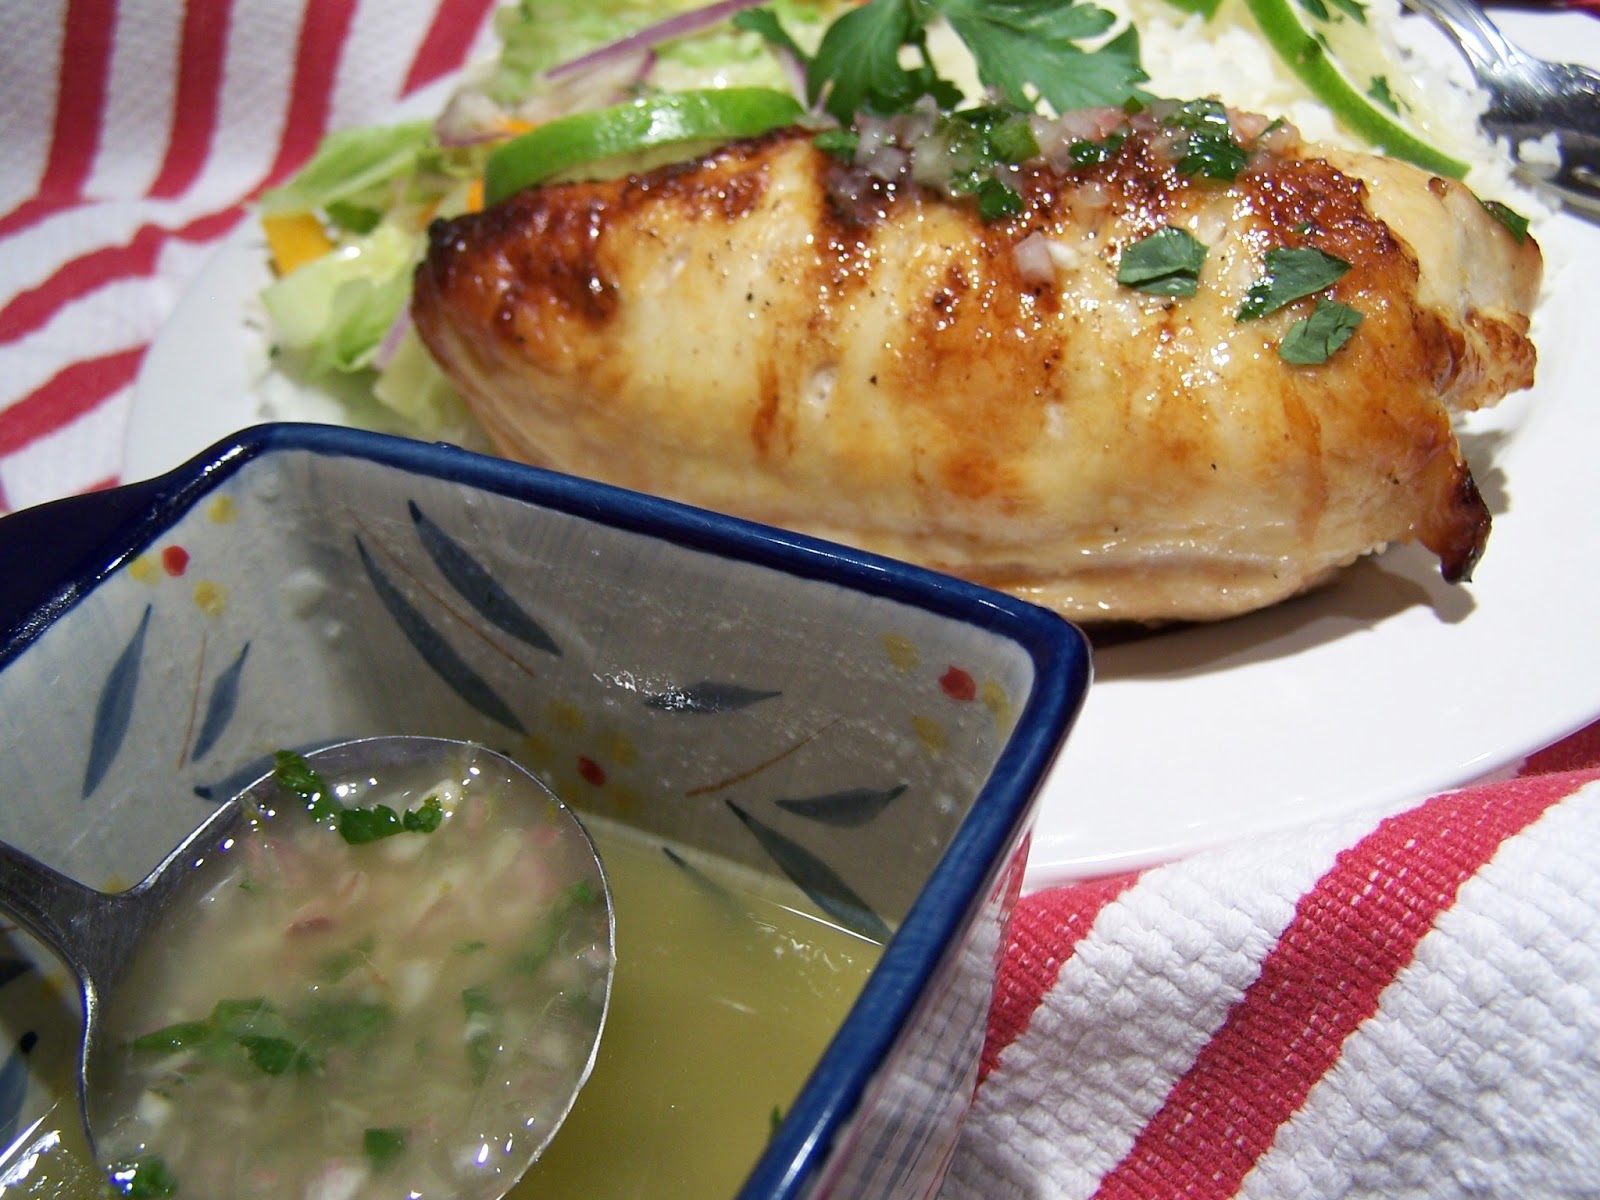
Drizzle the vinaigrette over the chicken and pour the rest in a small bowl and pass it at the table. We used it on everything!

**I don't use instant or quick cooking rice. If you do, just follow the instructions on the package and then add the lime juice and cilantro/parsley at the end.

Chef Steve Binks demonstrating the Jaccard Meat Tenderizer


Don't Forget To Follow Me On Social Media! I Post Blog Updates, Ideas For Kitchen "How To's", Restaurant Recommendations And Reviews... And Always Lots Of Photos!


You Can Have New Posts From Go Ahead Take A Bite Delivered Right To Your Inbox! Just Enter Your Email Address Here:


Delivered by FeedBurner
We will never send any advertising or provide your email address to any other blogs or businesses.

Don't forget that you can print this (or any) recipe using the "Print Friendly" button at the foot of each post. It's a great little feature that allows you to remove any pictures (or any text that isn't relevant to the recipe) before printing. That can save on ink and paper & in today's economy, who doesn't want to save a little cash when you can?!


Sunday, April 21, 2013

Barbecue Bacon Meatloaf


We're definitely meatloaf fans in our family, but we aren't always in the mood for the "Mom's Meatloaf" style that Hubby and I grew up on. (and that I make about 80% of the time) I've tried dozens of different recipes over the years. There have been some that I still make once in a while and some that I made once and never revisited. One of the recipes that I found (I think) in Gourmet magazine ages ago, took me half the day to prepare! No joke. I really mean half the day. My hubby loved it. So much so, that he'll still ask me to make it again, every once in a while. So far, the answer has always been a big fat N-O, but I did keep the recipe, so as the old saying goes,  never say never.

Monday, April 15, 2013

The Sandwich Board ~ The Cuban Sandwich


This has to be one of my favorite sandwiches, EVER. (hmmm... do I say that a lot?) There's something about the combination of savory roast pork, smoked ham, gooey cheese and tart dill pickles that makes my mouth water and my belly do a happy dance, even now as I'm writing about it. Put it all between two slices of buttery grilled bread, with a touch of mustard and mayo and it's simply heaven on a plate.

My love of this delectable sandwich and the recipe that I conjured up, came from the very first Cuban I ever tried while visiting friends in the Tampa Florida area. We took a little drive one lovely sunny March day and ended up in Saint Pete's Beach, at this little restaurant in a strip mall on 34th St North, called Rio's. Our friends had been there before and claimed that they made the best Cuban sandwiches in the area. (their Black Bean Soup was pretty awesome too) I really had nothing to compare it to at the time, but that didn't matter, because it was truly a case of love at first bite.

The Cuban Sandwich
  • Cuban Rolls** or Bread
  • Roast Pork, sliced thinly
  • Ham, sliced thinly
  • Swiss or American Cheese, sliced
  • Dill Pickles, sliced
  • Yellow Mustard
  • Good Quality "Real" Mayonnaise (we are "pro mayo")
  • Butter
You'll need a panini/sandwich press, heavy skillet or griddle pan. You'll also need another heavy pan or a clean brick, wrapped in a couple of layers of heavy duty aluminum foil. If you don't have all/any of those or like me, you're just too lazy or cheap to spring for every cooking gadget known to man, you can improvise and use my "in a pinch" method.***

Pre-heat whatever you're using to cook the sandwich ~ panini press, heavy skillet or griddle pan. I used a heavy skillet for the bottom and set it over a medium-low flame to heat up slowly and evenly. If you're using another heavy pan, the brick wrapped in foil, or my method for the top, you'll need to pre-heat that as well. The foil wrapped brick can be placed in a 400°F oven for about 10 to 12 minutes. ***My "in a pinch" method is a tea kettle that is 2/3 full of water and some aluminum foil. Yeah... that sounds a little weird, but it works. You can see the steps below.

If you have a panini press, then you already know what to do here.


This version starts with a crusty, medium density Italian or Artisan bread, like a Tuscan or Peasant style. I used a local bakery's Tuscan bread. This applies only if you are using a pre-sliced bakery style bread like we are**.

**The traditional Cuban sandwich is made on an authentic Cuban roll, but I've searched high and low and I've never been able to find any here in my region of the Northeast. I've tried standard submarine or hoagie rolls, but they were all too heavy and the crust was too crispy, so in comparison to a soft fluffy Cuban roll, they just didn't cut it. (If you're really ambitious and a stickler for authenticity, I found a recipe for authentic Cuban rolls that looks pretty good, HERE.


I recently found the most delicious deli roast pork loin that I've ever eaten. It's a brand called Columbus and while they have a pretty diverse selection of deli products, they seem to specialize in traditional Italian meats, like Capicolla, Mortadella, Sopresatta, Prosciutto and a plethora of Salami. They're a San Francisco based company and I would assume that their products are available across most of the country, so if you can find them please give them a try. All of their products that we've tried so far have been very high quality and absolutely delicious. They have a retail location finder on their site, as well as a list of the online food suppliers that carry their products, in case you want to have them shipped to you. (Yup. They're that good)

The opinions expressed are my own and I am not being compensated in any way for mentioning them here in my post.


Yes, I do realize that dill pickles come pre-sliced these days, but I only had the whole version on hand, so I sliced them up myself. Slice them as thinly as you can. To be truthful, I found that they're actually more flavorful and less watery than the pre-sliced type, but use whatever you have/prefer.


One of the keys to making a perfect Cuban is to have your deli person slice the roast pork and ham very thinly. (that's actually the key to most good sandwiches, in my book) You don't want it to be "shaved", but I ask the deli person to go just a notch above that on the slicer. I use an "off the bone" style deli ham, simply because I find they tend to be less salty and have a nice, even balance of smokiness and sweetness. If you can't get an off the bone version, I would recommend a Black Forest style for this sandwich.


First, spread a little yellow mustard on one slice of bread...


Start layering one of your meats on this slice. (I use about 4-5 slices, each... remember, they're thin)


Next, comes the American Cheese. Yes, if you don't have Swiss cheese, it really should be a deli sliced true American. (PLEASE, do not use the "singles" that come wrapped in plastic!) Because of it's mild, nutty flavor, it won't overpower the other flavors in the sandwich. Cheddar or any other strong or sharp cheese would compete far too much with the other ingredients. It also melts beautifully.

Also, unlike the deli meats we buy, we have our sandwich cheeses sliced on a medium setting. If there's one thing the hubbers will not tolerate, it's not being able to pull the cheese slices apart without a fight. It's happened before (rarely) and believe me, it makes for a very grumpy hubby. In all fairness, I have to say that I agree.


Then comes your second meat. To us, the order doesn't really matter. I just happened to use the ham first and the pork second.


Add lots and lots of thin dill pickle slices...


Next, spread a little mayo on the top slice of bread... Some say that a true Cuban sandwich would never have mayonnaise on it, but the first one that we ever ate, at that authentic Cuban restaurant in Tampa, had a combination of mayo and the yellow mustard. It could be that it was the owner's preference, but to us, all that mattered was that those sandwiches were like a taste of heaven. You can decide for yourself which you prefer, of course.

Top off the sandwich with your second slice.

Pet peeve... Big air holes in my bread! Grrrr!
Liberally spread room temperature butter on the outside of each slice of bread, or you can brush it with melted butter if you want to.


Place the sandwich in your pre-heated pan and do one of the following:

For the heavy pan or my tea kettle method, get your aluminum foil ready. (I had heavy duty foil, but if all you have is the standard thickness, simply tear off a large piece and fold it in half) If using a brick, it should already be wrapped well in foil before placing it in the oven.


Take the now blazingly hot pan or kettle off the heat, or the super hot brick out of the oven... (remember... don't attempt to remove the brick without oven mitts!)


Place the foil over the top of the sandwich...


Now place the 2/3 full kettle (or heavy pan or hot brick) on top of the sandwich and press down slowly and evenly. Let it sit there for about 4 to 5 minutes. Again, if you are using a panini press, you know what to do here.


Check the top and bottom of the sandwich after about 2 or 3 minutes, to make sure it isn't burning. You really shouldn't need to re-heat the top pan, brick or kettle, unless you're making several sandwiches in batches. My advice if that's the case, is to always have a second heated weight at the ready and just alternate.


When it's a beautiful golden brown, crispy, buttery masterpiece, remove it from the pan, slice it on the diagonal and enjoy! Just a word of caution... Prepare to become addicted to this sandwich. We had it twice last week for dinner. Just sayin'.

Be well, Eat well!

Mary

Don't Forget To Follow Me On Social Media! I Post Blog Updates, Ideas For Kitchen "How To's", Restaurant Recommendations And Reviews... And Always Lots Of Photos!


You Can Have New Posts From Go Ahead Take A Bite Delivered Right To Your Inbox! Just Enter Your Email Address Here:


Delivered by FeedBurner
We will never send any advertising or provide your email address to any other blogs or businesses.

Don't forget that you can print this (or any) recipe using the "Print Friendly" button at the foot of each post. It's a great little feature that allows you to save any recipe as a PDF, email a recipe to yourself (or a friend) and remove any pictures (or any text that isn't relevant to the recipe) before printing! That can save on ink and paper. Who doesn't want to save a little cash when you can?!


Related Posts Plugin for WordPress, Blogger...