


Great Side Dish For Any Holiday Meal!

There are several different recipes out there for broccoli casseroles. Most of them use cream soups and beaten eggs and bread crumbs and generally, frozen chopped broccoli. Some you make on the stove top, some in the crock pot and some, like this one, go in the oven. Don't get me wrong... I've tried out many of the different versions over the years and for the most part, they're really quite tasty. But I tend to gravitate toward simple, fresh ingredients that come together quickly and easily and create a simple, flavor packed dish.
I started making this broccoli gratin way back before I was married and have been asked to bring it to more family gatherings and potlucks than I can count. It's so easy and adaptable that it's even been a staple on our weeknight dinner table over the years. You can make as much or as little as you need, because it doesn't rely on a "set in stone" recipe to turn out the same delicious way, every. single. time. It's turns out tender broccoli, in a thick and creamy, super cheesy sauce. It's just that simple.
The amounts that I'm going to give you are what you'll need to feed about 15 to 20 people in a buffet style setting, which assumes that there will be several other side dishes to choose from and people will likely only be taking a small portion for their plate. OR, It should work out pretty much the same if you're going to serve this to a group of say... 6 to 8 "sit down" diners and are planning to have only one or two other side dishes to choose from, since people will probably be taking larger portions for their plate. See what I mean? It's ...adaptable.
Since it's such a forgiving recipe, you can change up the ingredient amounts according to how many folks you are serving, pretty much by guesstimating the different components of the dish. And after you've made it as many times as I have (or even just a few times, to be honest) you can practically throw the whole thing together in your sleep. It's an excellent side dish for a holiday dinner!

Cheesy Broccoli Gratin
- 4 to 5 Large Broccoli Crowns, **steamed
- 8 Tbls (1 Stick) Butter
- 8 Tbls AP Flour
- 2 Cups Milk, plus 1 extra Cup
- 4 Cups Extra Sharp Cheddar Cheese, shredded
- 1 Tsp Kosher Salt
- 2 Tsp Onion Powder
- 1/2 Tsp Dry Mustard Powder
- 1/2 Tsp Fresh Ground Pepper
- Pinch Ground Nutmeg (optional)
Cut your broccoli into good sized pieces, that have both the floret and a couple of inches of the stem (see photo above) and steam it until it's just barely tender. Remember, it's going to cook another 20 to 30 minutes longer in the oven. I use a large stainless steel colander, set into a 6 quart dutch oven with a few inches of water in the bottom. I bring the water to a boil, turn it down to a steady simmer and throw the lid from the dutch oven on top as it steams. If you have an actual steamer basket, that's great too. Cook until the stems are just barely fork tender.
**Quick Tip: Placing the broccoli stem sides down in the colander in a big concentric circle, helps to cook them more thoroughly, without the florets getting mushy. For the thickest stems, I also make a slice about a half inch to an inch deep in the bottom. As soon as the stems are just barely fork tender, take them out and place them immediately into a big bowl of liberally salted ice water to "shock" them. (seasons them and stops them from cooking any further)

For those of you who already know how to make a basic white sauce, you can skip over this part of the directions and scroll on down to the assembly part.
While the broccoli is steaming, you can start your white sauce (bechemel). A basic white sauce begins with equal parts of butter and flour. In culinary terms, this is called a roux (sounds like roo). Melt the butter in a medium sauce pan, being careful not to let it brown or burn. Add the flour and whisk or stir with a fork to combine thoroughly. At this time you can add in your salt, pepper, mustard powder and onion powder and stir them in well.


After cooking (while still stirring) the roux for 3 to 5 minutes, you can begin adding your milk, slowly and in parts. Again, be sure to keep whisking or stirring as you add it.
Now... here's the thing. Many people (trained chefs, etc.) insist on gently warming the milk first, but you see, I'm a little impatient and I don't bother with that step. It will help the milk blend more quickly with the roux initially and it does help the sauce thicken a bit more quickly, but I've (literally) made this hundreds of times and I guarantee that you'll still have some lumps with your first addition of milk. Plus, the time saved in the thickening process, isn't really enough of a difference (in my world, anyway) for me to justify dirtying another pan to heat the milk. So.... I'll leave that decision up to you.


Now it's time to add the wow factor!

A little cheese primer: OK... You can do one of two things here. You can buy the pre-shredded cheese if you want to save on time and energy, BUT, I really recommend shredding your own. (or getting your significant other or the kids to do it for you) There truly is a difference. In texture and in taste. I can't guarantee the highest number of ooohs and ahhhs over a broccoli gratin made with the pre-shredded, pre-packaged cheese. Most of the manufacturers add preservatives and usually corn starch or some other agent to keep it from clumping in the package.

Slowly sprinkle in 2 cups of the shredded cheddar, again stirring constantly as it melts into the sauce. I know... it's a lot of stirring. But, it's so worth it! And you can probably skip the upper body part of your daily workout on days that you make this! Now, there's a bonus for ya, eh? Yay!!

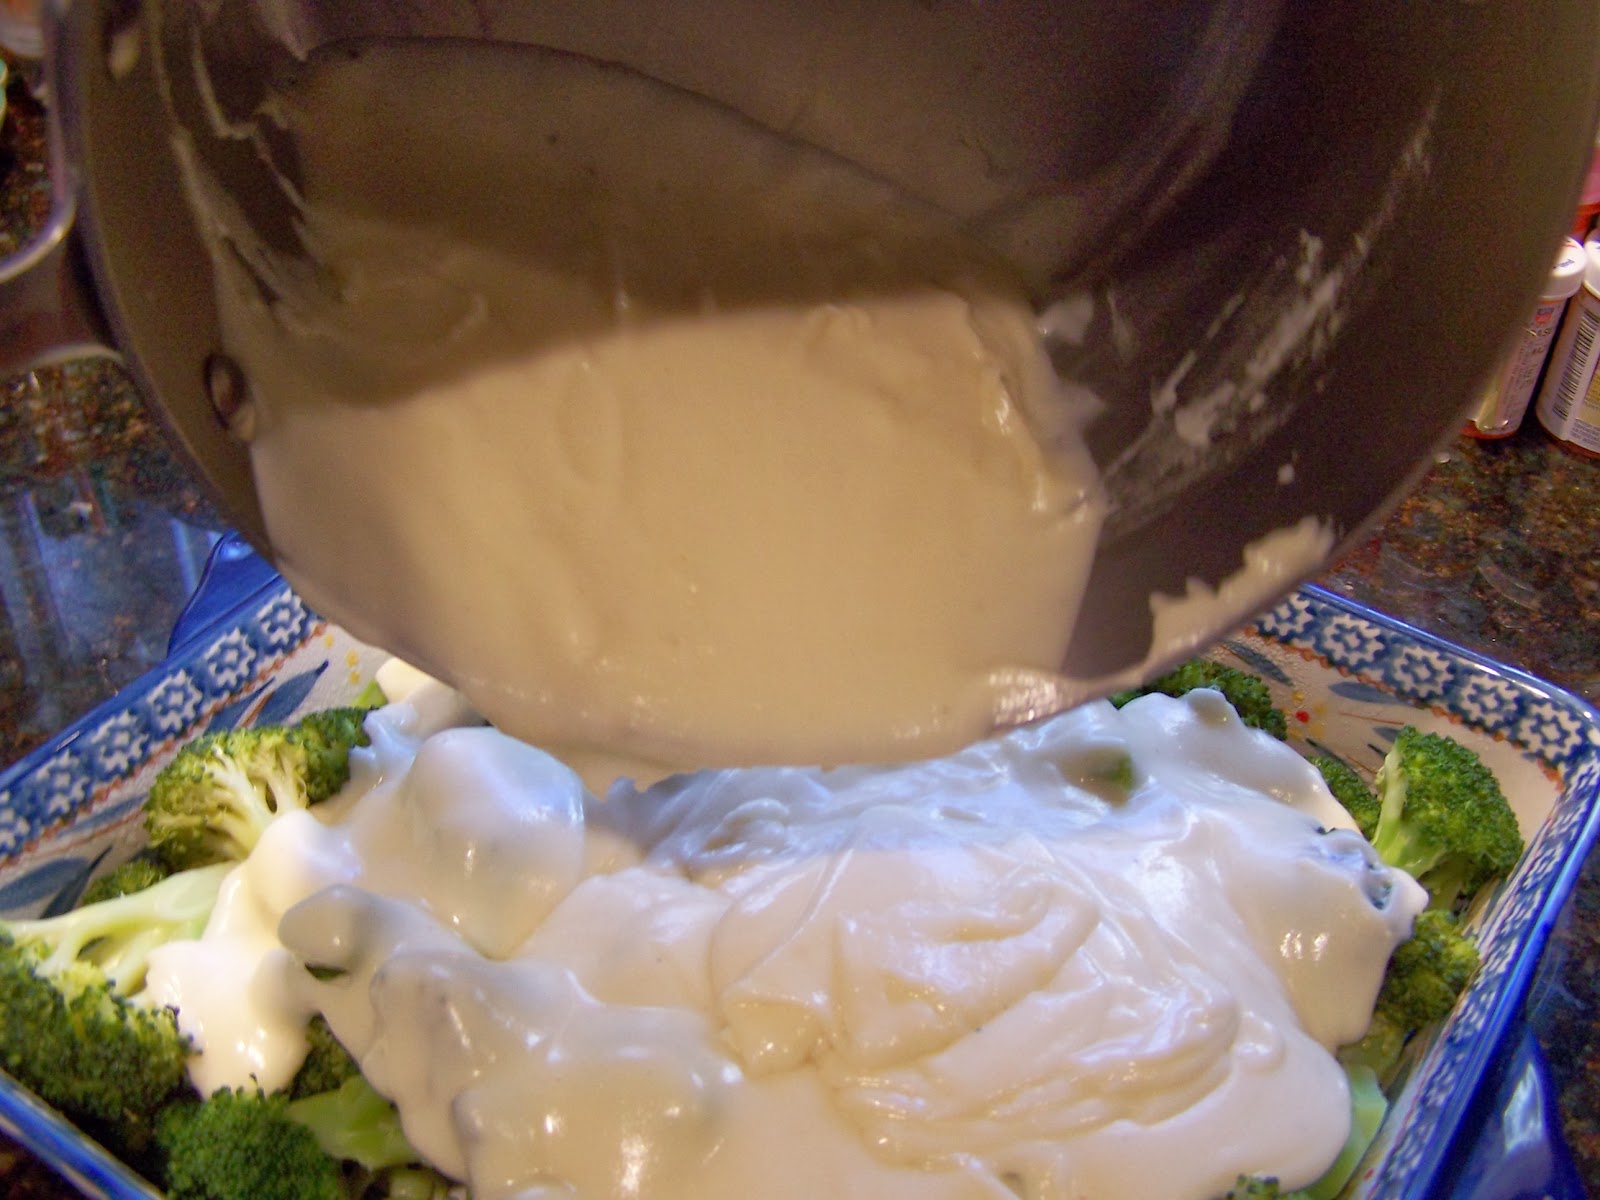
The sauce is ready when it is smooth and thickly coats the back of a spoon. It will thicken a bit more as it cools, so if you are making the sauce ahead of time and refrigerating it, you'll need to heat it gently over a low flame until it reaches a pourable consistency. I keep my sauce really thick, because even broccoli that's been patted dry after being removed from an ice bath still has strong potential to give off a bit of liquid during the baking.

Arrange your cooked, patted dry broccoli in a baking dish that will hold it in two layers - or less if you're making a smaller batch.

If the sauce doesn't spread all the way out to the sides or corners, that's just fine because you're going to be covering the entire top with the remaining 2 cups of cheese. Hey... the name of this dish is Cheesy Broccoli Gratin, after all.

Using the remaining 2 cups of shredded cheddar, cover the entire top of the dish, doing your best to cover any of the florets that are poking out of the sauce. This will keep those pieces from getting burned or over-cooked. Like most cruciferous vegetables, broccoli will get a little bitter if it burns. When you're roasting it, you want this to happen to some extent, but in a creamy cheese sauce, that's just not the flavor profile that I'm going for.

Bake the gratin at 350° for 30 to 40 minutes, depending on your oven and how cold the dish is when you place it in the oven. As is the case with any casserole that's been covered in a creamy/cheesy sauce, you want it to be heated all the way through to the center and golden brown and bubbly all over.

I'm really sorry that I don't have any photos of the "finished" gratin, but this was made and served on Thanksgiving Day and I never get the time (or a chance) to take photos of the food, once it's been set out on the buffet.
I suppose I could try to push my way into the
Don't Forget To Follow Me On Social Media! I Post Blog Updates, Ideas For Kitchen "How To's", Restaurant Recommendations And Reviews And Always Lots Of Photos!
Don't forget that you can print this (or any) recipe using the "Print Friendly" button at the foot of each post. It's a great little feature that allows you to remove any pictures (or any text that isn't relevant to the recipe) before printing. That can save on ink and paper & in today's economy, who doesn't want to save a little cash when you can?!


