Sunday, March 27, 2011
Be Careful What You Wish For!
Howdy Folks,
Sorry for the absence this past week, but I'm just now getting a moment to check in. Unfortunately, in the midst of my late Winter pity party, I received a call from my dear friend (and sister-in-law) saying that her father had passed away. They live out of state so would of course, be coming home right away. The news obviously made me take a step back and realize that life may feel like it's getting stagnant at times, but the truth of it is that it's too darned short and it's a waste of precious time and energies complaining about it. You all gave me some great advice in my previous post and you are all right on the money. Truly living life means doing what you can to make the best of it.... No matter what lands in the path ahead us.
My house began filling up last Sunday and my brother-in-law and sister-in-law headed back home to begin their healing yesterday afternoon. It was a tough week, but at the same time, one that was full of love and family and laughter and tears. Our daughter even made it home for a few days, so that was an unexpected blessing. I'm a bit worse for the wear with my chronic pain, but all in all, it's been a great lesson in acceptance. When something like the loss of a loved one happens, it makes the things that we might perceive as hard times in our own life, seem minor in comparison. Maybe the occasional "rut" isn't really a bad thing. Maybe it's just God's way of making us slow down and be still, so we can listen.
I'll be back in the next day or two with a new recipe, (and I believe a renewed outlook) but for the moment, please allow me to say a great big THANK YOU !! to all of you, for the wonderful suggestions and that ever-present, totally awesome blogger support. As I've said, oh... I don't know... maybe a gazillion times before,
BLOGGERS ROCK !!!
In This Post:
Friends,
Home Sweet Home,
New Beginnings,
Unexpected
Monday, March 21, 2011
Am I In A Rut?
I'm sure we've all felt like we were stagnant or at least on our way there, once or twice in our lives. If you're reading this and you've never felt like this, then you are truly blessed and I'd love to touch your hand or stand in your shoes or rub your head. Anything that might allow some of your good fortune to rub off on me.
I started to write this long drawn out post explaining why I've been feeling stuck lately, but then I thought better of it. I mean, who wants to spend 10 or15 minutes of their busy day reading all of the gory details of some peri-menopausal, almost 50 year old woman who's having a ginormous pity party and feeling like life has been playing a cruel joke on her? Not me!
So, to keep this short and to the point, I'll just come out and say what's on my mind. I feel like I'm in a great big muddy rut and that rut's getting wider and deeper as each day passes. I keep seeing the most wonderful pictures of Spring flowers and green grass and sunny blue skies all over the blogosphere, and as I sit here typing away at my keyboard, the snow is falling and rapidly accumulating right outside my window..... AGAIN!
UGH!!!!!
(and that's being polite)
Don't get me wrong. I love seeing the evidence of Spring emerging as I pop around visiting all of my favorite blogs. It's about the only thing that has been giving me any hope that it will ever happen here! So please don't stop posting your wonderful Spring photos. It's about all that's keeping me sane at the moment.
Anyway..... I decided to look for some answers or solutions to this rut I'm in, by doing a little searching in cyberspace. So,
A) If anyone out there has any suggestions about how I can start digging myself out of this trench, please, please share them with me!
B) I'll start the ball rolling with something that came up in a Google search for "stuck in a rut" and see if the author knows what she's talking about...... (I kind of think she does.)
Hope everyone is having a much better week so far than I am!
In This Post:
Help,
New Beginnings,
Spring,
Stuck,
Weather
Friday, March 18, 2011
A Perfect Spring Cake (Mandarin Orange/Pineapple Cake)
Recipe versions for this cake have been around for many years and most that I've seen use a boxed cake mix and refrigerated whipped topping. I'm would assume that the original recipe was made with all fresh ingredients for both the cake and the filling/frosting. This one seems to fall somewhere between the two. It calls for both prepared ingredients and some scratch. In this case for instance, it's the cake. All I know is that it's one of those wonderful food memories from my childhood that Mama made. As a matter of fact, for several years it was my birthday cake request.
** Mom used to buy a packaged orange Chiffon Cake from the only place around here that carried them.... The A&P. For some reason, they stopped carrying them in the 80's. Mama never made the cake again, but I found an excellent recipe for a scratch Orange Chiffon Cake, because I just couldn't live the rest of my life without this cake in it!
Mandarin Orange/Pineapple Cake
The Cake:
This cake can be made a day ahead and refrigerated until ready to use.
- 1 3/4 Cups Self Rising Flour
- 1/8 tsp of Salt
- 6 Egg Yolks
- 1/2 cup of Granulated Sugar
- 3/4 cup Mandarin Orange juice/Tangerine juice/Orange juice
- Zest of 1 medium Orange
- 1/4 cup of Vegetable Oil
- 3/4 cup of granulated sugar
- 6 egg whites
- 1 tsp of cream of tartar
Pre-heat oven to 325 degree F.
Sift Flour and Salt onto a sheet of waxed paper. In a large bowl, beat the yolks, 1/2 Cup of Sugar, 3/4 Cup Orange Juice, 1/4 Cup Oil and Zest until pale yellow and slightly thickened. Add Flour and Salt mixture to the bowl and mix by hand until smooth. Set it aside.
Beat 3/4 Cup Sugar, Egg Whites and Cream of Tartar on high speed until stiff peaks are formed. They should not fall out if you turn the mixing bowl over. Gently fold the Egg Whites into the Egg Yolk/ Flour mixture in thirds until fully incorporated, being careful not to deflate it too much.
Pour batter into ungreased 10" tube pan or two 9" round cake pans and bake for 55 to 60 minutes or until a wooden skewer inserted into the center of the cake comes out clean.
Use a long piece of clean thread or unflavored dental floss to slice the cake into 4 layers. (or each 9" round cake in half) Now, this might sound difficult but if you measure out your layers with a ruler first and insert a long wooden skewer into the cake at each place where you wish to cut it, the thread or floss will glide right on top of the skewer (pulling toward yourself in a side to side motion) very easily. A good bread knife will work too.
Place each layer on it's own sheet of waxed paper in preparation for being brushed with syrup. (recipe follows) You can mark each sheet of waxed paper with a food safe marker so that you can make sure that your layers go back on in the order that they were removed.
In the spirit of full disclosure, I should mention that you can use a store bought Sponge, Angel Food or Chiffon Cake (if you can find one) or there are a few boxed Chiffon Cake mixes out there too, but trust me... the scratch cake is so worth the additional steps that it requires.
Next.... Once cooled, brush each layer of the cake with about 1/4 cup of simple syrup and allow it to soak in. (I often add about 2 Tbls of Orange Liqueur {ie. Grand Marinier} to my cooled syrup before this step)
Simple Syrup:
- 1 Cup Granulated Sugar
- 1 Cup Water
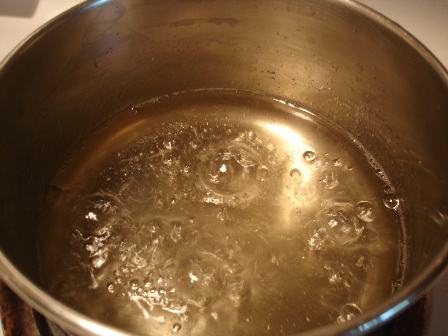
You should never stir a simple syrup with a spoon until after the sugar has dissolved completely. The pan itself can be swirled a bit as it simmers, but stirring it can cause it to form crystals, which you do not want.
Simple Syrup can be used in so many things. It's the traditional sweetener for homemade Southern Sweet Tea and Lemonade. It can be infused with any number of flavors and is a key ingredient in some of the most delicious and popular cocktails out there, from Margaritas to Mojitos.
I always make a triple or even a quadruple batch to use in all kinds of recipes. It will keep quite well in an airtight jar or container for a couple of months when refrigerated. Some chefs say that it doesn't need to stay cold, but I made some several years ago for our bar, and even though I had it in an airtight container, it got stale or what I felt was actually moldy, after a week without refrigeration.
So... Back to the Cake:
 |
| The frosting/filling is a bit lumpy so it's not the prettiest thing, but boy oh boy, is it ever delicious! |
- 1&1/2 Cups Very Cold Whipping Cream
- 1 5.1oz Box Instant Vanilla Pudding/Pie Filling Mix
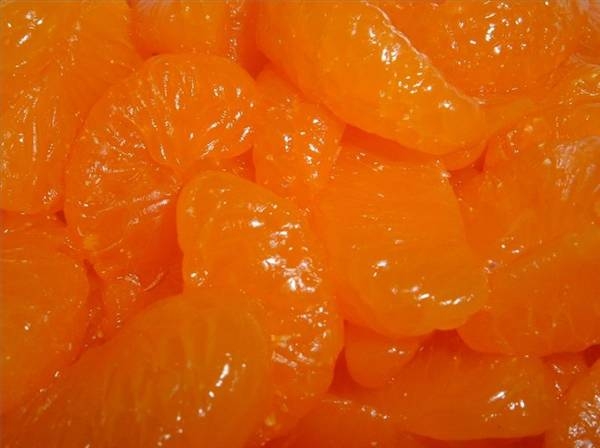
- 1 15oz Can Mandarin Oranges, drained very well
- 2 8.5oz Cans Crushed Pineapple, drained very well
Roughly chop all but about 15 of the drained Mandarin Orange pieces, leaving the extra segments whole to decorate the finished cake.
Add the drained Crushed Pineapple and drained and chopped Mandarin Oranges to the Cream and Pudding mixture and combine thoroughly by hand, so as not to break up the chopped fruits any further.
Chill this mixture for about 30 minutes so that it will thicken and set up better.
When ready to assemble the cake, start stacking the cake layers, spreading about 1/2 Cup of the frosting on each one. When all the layers are filled and stacked, frost cake top and sides with remaining frosting.
Decorate the top of the Cake with the reserved Orange segments if you'd like to, and chill for at least 1 hour before serving. (2 to 4 hours is even beter)
Enjoy!
 |
| I didn't get a photo of the finished cake, but I found this photo on Google Images and it's a good example of how to simply decorate it with the orange segments. |
Don't forget that you can print this (or any) recipe using the "Print Friendly" button at the foot of each post. It's a great little feature that allows you to remove any pictures (or any text that isn't relevant to the recipe) before printing. That can save on ink and paper & in today's economy, who doesn't want to save a little cash when you can?!
In This Post:
Cakes,
Childhood Memories,
Desserts,
Mom's Recipes,
Orange,
Pineapple,
Recipes,
Traditions
Thursday, March 17, 2011
Happy St. Patrick's Day!!
Hello Friends!
Since everyone is supposed to be a little bit Irish on St. Patrick's Day, I thought I'd share a clip or two from some of my favorite movies about Ireland and the Irish. I hope everyone enjoys them as much as I do. I lift my cup o coffee to ya and say.... Slainte Mhaith!
In our house it couldn't possibly be St. Paddy's Day without "The Quiet Man". This movie has to be the most watched and recognized film related to the holiday and John Wayne and Maureen O'Hara were the perfect choices to play Sean Thornton and Mary Kate Danaher. The score for the film was written by composer Victor Young, but the melody played most throughout the film is called The Isle of Innisfree and was written for the film by Dick Farrelly - a policeman turned songwriter - on a bus trip from County Meath to Dublin. (the song, as sung by Celtic Woman is posted below the movie clip.)
This next clip has to be one of my favorite Barry Fitzgerald scenes out of the hundreds of movies he was in during his long career. It's from the movie "Going My Way". He actually won an Oscar for Best Supporting Actor in this Best Picture Award winning film.
As a brief summary leading up to this clip, Father O'Malley (Bing Crosby) has been sent to St. Dominic's to take charge by the Bishop, because Father Fitzgibbons (Barry Fitzgerald) is getting on in years and the parish is in financial trouble. Even though the older priest isn't too happy about Father O'Malley at first, he grows to appreciate and care for the younger priest. Just as things are looking up at St. Dominic's, the church burns down and through a series of efforts by all, the funds are raised and Father O'Malley is told by the Bishop that he's being transferred to a new parish that is also in trouble and needs his help. At an earlier point in the movie, the old priest mentions to Father O'Malley that although he's come close several times, he's never been able to make it back home to see his dear mother, since he first left Ireland 45 years ago.
Now, there's one more song that I just have to add. (you just heard a tiny bit of it in the last clip) For me, it wouldn't be St. Patrick's Day without hearing it. It's a song that is very dear to me because my mother sang it to me when I was a child. I know that may seem a bit cliche', but it's true. I also sang it to my daughters. It will always tug at my heart and always remind me of Mama. Always.
In This Post:
Childhood Memories,
Holidays,
Home Sweet Home,
Movie Clips,
St. Patrick's Day
Wednesday, March 16, 2011
Corned Beef & Cabbage, My Way
They say that on St. Patrick's Day everyone's Irish. Well... I'm the real McCoy. Or maybe it's O'Something! I'm 100% Irish. First generation American. (for the sake of full disclosure) But... I won't be making the same Corned Beef and Cabbage that many people in the US are used to. What it will be, is a traditional "boiled dinner". It will contain cabbage and onions and carrots and of course, potatoes. But the meaty part of our St. Pat's Day dinner will be beef brisket and/or ham.
What? Ham, you say? Yes, Ham. You see, traditionally, the Irish didn't have anything quite like Corned Beef back in the day. They usually cook a traditional boiled dinner, that can be made with Beef, Lamb, Mutton (older lamb/sheep) Ham and/or Bacon. Now, it's not the kind of bacon that we're used to having for breakfast or on a BLT. Irish bacon is a bit closer to Canadian bacon. But not exactly... Ah well, The picture below will give you a better idea.
The recipe that I use is a combination of my Mom's and my own. She used only ham. (Dad just couldn't wrap his brain around corned beef) She also used only water as her cooking liquid, where I use chicken broth and a pint of good Irish Ale. The type of ham that I use is also different. Mom usually got a small butt portion of cured ham, but I use smoked ham hocks. Luckily, I have a great relationship with ye olde neighborhood butcher and he always holds the biggest, meatiest hocks that he has, just for little old me. (must be my rosy Irish cheeks! LOL)
Here's a little primer on the meats that I use:
I use the "point cut" of the brisket (bottom left) when making a boiled dinner and the flat cut when making a boiled dinner. And I don't ever buy the vac-packed type that has been brined (or corned) and that comes with the spice/seasoning package inside it. I prefer to get a fresh point cut from the butcher counter and add my own spices.
I also use Smoked Ham Hocks (usually 2 medium hocks). I know... Not the prettiest pieces of meat you've ever seen, but the flavor they impart is just incredible! The rest of the ingredients are pretty simple and they're basic to any traditional boiled dinner.
This makes a pretty large pot of food and should serve 6 to 8 people. (More if your guests are primarily interested in drinking their St. Pat's Day dinner! LOL)
"Fresh Corned" Beef, Ham and Cabbage
- 1 5-6 Lb Point Cut of Beef Brisket
- 2 Meaty Smoked Ham Hocks
- 8 Cups Low Sodium Chicken Broth
- 1 Bottle Irish Ale (Harp)
- 8 Whole Peppercorns
- 2 Bay Leaves
- 4 Juniper Berries
- 6 Whole Cloves
- 1 Tsp Mustard Seed
- 3 Large Yellow Onions, peeled and quartered
- 4 Whole Cloves Garlic, peeled and smashed with the back of your knife
- 1 - 2 Lbs Carrots, peeled and cut into 3" pieces (I use 2 Lbs)
- 6-8 Medium Red Potatoes, scrubbed and cut into quarters
- 1 Large Head Green Cabbage, core removed and cut into good-sized wedges
- Kosher Salt and Fresh Cracked Black Pepper
- 8 x 8 inch piece of Cheese Cloth
- Kitchen Twine
Once the meats are golden brown, cover them with the broth and beer. If the meat is not completely covered, add just enough water or extra chicken broth to do so. Don't add all the vegetables at this point. Tie up the bay leaves, cloves, peppercorns and mustard seed in the cheesecloth with the twine to make a sachet and throw that in the pot with about 1/3 of the onions and your 4 cloves of garlic. Bring to a boil over medium-high heat and then turn the pot down to a simmer. Cook, uncovered for 3 to 4 hours, or until the brisket is very tender and the ham is falling off the bone. Skim any foam off the top (as needed) while simmering.
Now it's time to add your potatoes, carrots and the remaining onions and cook for another 45 minutes to an hour. 15 minutes before the full cooking time is up, add the cabbage. Simmer for another 15-20 minutes until the cabbage is just tender.
More broth or water can be added throughout the cooking process, in order to keep the liquid level just barely above all of the ingredients. Before serving, taste for seasoning and if you feel like it needs a little more salt and fresh cracked pepper, you can add them at this time.
I serve my meal with some of the broth from the pot, lots of good whole grain mustard and malt vinegar on the side. (of course, a wee bit o' Irish butter (if you can get it) on the taters and veg isn't a bad thing either!) I also serve a good hearty bread from the bakery or if I have enough time I'll make Cheddar and Dill Scones. (courtesy of Ina Garten) My beverage of choice these days is usually just ice water or maybe a glass of white wine, once in a blue moon. The Hubbs loves a nice Guinness Stout or three... after all, it is St. Pat's Day!
Slainte!!!!
Mary
Don't forget that you can print this (or any) recipe using the "Print Friendly" button at the foot of each post. It's a great little feature that allows you to save any recipe as a PDF, email a recipe to yourself (or a friend) and remove any pictures (or any text that isn't relevant to the recipe) before printing! That can save on ink and paper. Who doesn't want to save a little cash when you can?!
In This Post:
Beef,
Boiled Dinner,
Brisket,
Cabbage,
Corned Beef,
Ireland,
Irish Bacon,
Mom's Recipes,
My Twist,
Potatoes,
Smoked Ham Hocks,
St. Patrick's Day,
Traditions
Sunday, March 13, 2011
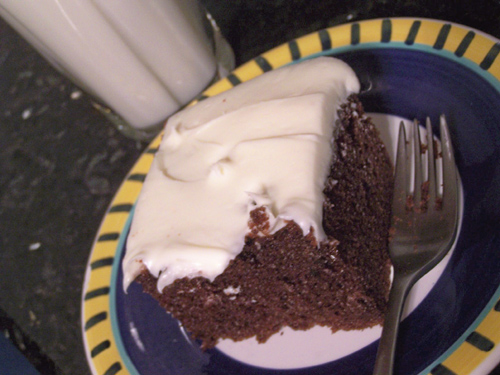
Grandma Sullivan's "Jiffy" Chocolate Cake (not from a box!)
There are certain things that evoke a sense of yearning for days long since passed. Memories of standing on the stool in the kitchen, next to Mama as she measured out the ingredients, pulled out just the right pan, mixed those cups of milk and flour and spoonfuls of sweet smelling spices in a big bowl, and somehow made it all come out of the oven a little while later as something that made you feel good. You didn't know why it made you feel so good. Of course it tasted great. It might have even looked pretty, if Mama was a "fancy" kind of cook. But those weren't the reasons that it made you feel the way you did inside.
Looking back now, as a mom myself (and hopefully a grandma/a nana/a granny someday) I realize that the reason it made me feel so good was simple. It was because my mother made it for me. Even in a world where Mom's don't always get the chance to stay at home, there will always be moments that create those good feelings in our children. Whether it's watching Mom cook or sitting next to her in the big cozy chair in the family room as she reads a story, or when she tip-toes into the bedroom as soon as she gets home at the end of a hard day and quietly, lovingly kisses her child on the forehead.
Til the end of time, Mom's will continue to create the memories that later on in life will evoke those same good feelings in their grown children. The following recipe is one of the things that brings that feeling back to me. Every time I make it, I think of Mama's hands as she sifted the flour and sugar and made the little wells that held the liquid ingredients. I can smell the cocoa powder before I even open the tin. I can taste the rich, dark moist cake and the simple sugary frosting that is as bright and white as the cake is deep, dark chocolaty brown. Keep in mind that this isn't the Jiffy Cake Mix that's been around for about a hundred years. It's a scratch cake, made simply from ingredients that most everyone has in their pantry. I suppose it got it's name because it's made in one pan "in a jiffy". I'm not sure if the name was given to this cake before or after the boxed mix came out, but I do know that it's delicious and more importantly, it just makes me feel good.
Grandma Sullivan's Jiffy Chocolate Cake
| Mama's Recipe Box and Recipe |
Cake Ingredients
1 &1/2 Cups All Purpose Flour, sifted (I sift it onto a large sheet of waxed paper to start)
1 Cup Granulated Sugar
3 Tbls Cocoa Powder (I use Dutch Processed)
1 Tsp Baking Soda
1/2 Tsp Salt
1/3 Cup Shortening, melted and cooled slightly or Vegetable Oil (I use Canola Oil)
1 Tbls Cider Vinegar
1 Tsp Pure Vanilla Extract
1 Cup Cold Water
Measure out Flour into sifter and sift onto a large sheet of waxed paper. Add Sugar, Cocoa Powder, Soda and Salt and then pour all ingredients into the sifter and sift together into an 11"x7"x2" rectangular baking pan. (If you are using a 13"x9"x2" pan, then you'll need to make 1 and 1/2 times the recipe)
Spread out the dry ingredients evenly and with your fingers or a spoon, make 3 "wells" or impressions, about 2" apart. Pour vinegar in one, vanilla in the second and oil or shortening in the third. Pour Cold Water over the whole thing and stir with a fork until well mixed. There might be a few tiny lumps, but that's fine. You don't want to over-work the batter.
Bake in a 350 degree, pre-heated oven for 28-30 minutes, or until a toothpick inserted in the center of the cake comes out clean. (or with a few moist crumbs) Allow it to cool in the pan for about an hour.
Frosting
1 Cup Unsalted Butter (or 1/2 cup butter and 1/2 cup pure vegetable shortening)
4 Cups Confectioner's Sugar (I sift it, but you don't have to)
2 Tbls Milk (whole or 2% work best)
1 Tsp Pure Vanilla Extract
Tiny Pinch of Salt (if using salted butter, this should be omitted)
Using a large spoon, or an electric mixer (I use a hand mixer) beat Butter, Salt and Vanilla in a large bowl until it's smooth and creamy. Gradually add the Confectioner's Sugar (approx 1 cup at a time) alternating with a few drops of milk until all of the Sugar is combined. (you may not need all of the milk if it's humid) Spread frosting on cooled cake and serve. I like to refrigerate any leftover cake, but as long as you keep it covered it isn't necessary.
This isn't a fancy cake. It's not filled with anything or made with exotic ingredients. It's just a simple old fashioned sheet cake, but that's what makes it so beautiful. It's simplicity. And I don't know about you, but more often than not, simple things just make me feel good. Enjoy!
In This Post:
Childhood Memories,
Chocolate Cake,
Desserts,
Mom's Recipes,
Old Fashioned,
Recipes
Friday, March 11, 2011
I Really Need Some Spring!
This is what my back yard looked like yesterday morning:
It still looks pretty much the same, except the snow is now rain. (sigh)
Soooo, I thought I'd dig up some pictures that I took last summer and post them today. Hopefully they'll remind me that Spring and Summer are not really that far away. It's going to take some serious convincing for me to believe it, (as I sit here listening to the plow scraping along my neighbor's driveway) but maybe if I just sit and stare at this post long enough, the water lapping at the shore, the graceful beauty of the flowers and the sunny blue skies and green grass will be imprinted in my subconscious and I'll think it's true. If you're living in an area that looks anything like that first picture and feeling the late winter blues too, feel free to try it along with me!
Well, on with the experiment.....
For some added inspiration, I'm linking up with Java's 40 & Over Friday Blog Hop. I look forward to meeting some new friends!
Thursday, March 10, 2011
Classic Tuscan? Insalata Panzanella
Since my recent post about Spring and farmer's markets, I've found myself having strong cravings for some of the foods that truly showcase the lush ripe bounty that they offer. Maybe it's because certain areas of the Northeast have been hit with a foot or more of snow in the last couple of days and as hard as it is for me to even type the letters on my keyboard, more arrived this morning. To go along with this very unwelcome white
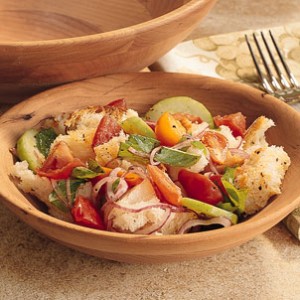
When I think classic Italian salad or "Insalata", my thoughts go immediately to two of my favorites; Panzanella and Caprese. For this post, I'm going to share my recipe for Panzanella. Now, as is the case with most classic regional foods, there is an ongoing debate over just where the idea for this "stale bread" and vegetable delight originated. Tuscany, Florence, Piedmont and several other regions of Italy have all claimed ownership and just like most any other traditional dish from a particular country or region, there are dozens and dozens of methods of preparation, and the ingredients can vary from just slightly, to almost completely different. My recipe is more of a combination of a few recipes that I've seen and some of my own ideas that best suit my family's tastes.
Insalata Panzanella
- 1 Lg loaf Tuscan, Peasant or Ciabatta Bread, cut into bite sized cubes (removing crust is optional)
- 4 Tbls Virgin Olive Oil (light to medium color and taste) for frying bread
- 1 Lg European Cucumber, peeled and cut into 1 inch cubes (approx)
- 3-4 Roma (Plum) Tomatoes, juice and seeds removed, cut in same size as cucumbers
- 1 Lg Red Onion, peeled and cut in half then sliced, approx 1/4 inch thick
- 1/2 Cup Gaeta or Kalamata Olives, pitted and sliced in half or thirds, depending on size
- 2 Tbls Capers, drained, rinsed and roughly chopped
- 5 to 6 Fresh Basil Leaves, torn roughly
- Kosher Salt and Fresh Ground Black Pepper, to taste
The Dressing
- 1 Cup Medium or Light Olive Oil
- 6 Tbls Red Wine Vinegar (White Balsamic Vinegar is also quite good)
- 1 Tsp Superfine Sugar
- 1/2 Tsp Kosher Salt
- Fresh Cracked Black Pepper
Heat 4 Tbls Olive Oil in large skillet until the end of a wooden spoon inserted into the pan, sizzles and tiny bubbles come from it. (trust me... it works) Season the bread cubes with a little bit of salt and pepper and toss them into the hot oil in a single layer. Turn them frequently with tongs or a spatula, until they're golden brown and crispy on all sides. Remove with slotted spoon onto paper towels, to soak up any excess oil. Sprinkle with a little more salt and set them aside.
The Salad
In a medium to large salad or serving bowl, combine the Cucumbers, Tomatoes, Onion, Olives and Capers and gently tear the Basil leaves into small pieces. Add Salt and Pepper. Toss well with salad tongs, a spoon or your very clean hands to mix thoroughly. At this point you can cover it and refrigerate it if you aren't going to serve it right away.
Combine the dressing ingredients in a small bowl and whisk together until well combined. You can also do this in a jar with a tight fitting lid and shake it well, or in a blender or food processor. Whatever is most convenient for you will work.
Just before serving, add dressing and toss to coat the vegetables. Add the croutons and serve immediately. This makes a great first course or side dish with all types of meat and seafood. It also makes a light and really satisfying supper on a hot summer night. Buon Appetito!
In This Post:
Fresh Produce,
Italian Food,
Recipes,
Salads,
Summer Suppers,
Weather
Wednesday, March 9, 2011
Great Food In An Unexpected Place
Due to some ongoing health issues, I have the occasion to take a trip into Manhattan a few times a year to see a specialist at NYU Medical. As much as we'd love to stay right in the city, it can be more than a bit cost prohibitive, especially when the doctor I'm seeing doesn't take ANY health insurance. Yep. None.
We generally stay just over the river in New Jersey and drive into the city the next morning for the appointment, but this time Hubbs decided he'd like to try driving just to Poughkeepsie and then take the train into the city instead. Parking, even at places like the major hospitals can be a nightmare and very costly. The last time I had an appointment, they had us double parked in the parking garage! You should have seen Mr B scanning the car with an almost cyborg like precision for dents or dings when we went to pick it up. I think it was just more than his heart could stand!
Anyway..... The point of my story is less about parking and more about the amazing Food Concourse at Grand Central Station. The building itself has been a Manhattan treasure and a stunning example of the Beaux-Arts style of architecture, since it's current structure first opened officially as Grand Central Terminal in 1913. It's gone through dozens of renovations, additions and restorations during the years since, but has remained the central hub of all train travel activity leading in and out of New York City.
One of the many levels and wings of Grand Central is the Food Concourse. Now, when one thinks of "travel food" or food you would most likely get while on the road, it generally isn't anything that could be considered fine dining. If anything, the words "fast food" usually come to mind. At Grand Central's Food Concourse this is definitely not the case. There are dozens of casual dining restaurants as well as some of the finest dining in Manhattan right there for you to enjoy. The world famous Oyster Bar Restaurant and Campbell Apartment Cocktail Lounge are prime dining and socializing destinations for both locals and tourists alike.
 |
| The Oyster Bar Restaurant at Grand Central Terminal |
 |
| The Campbell Apartment Lounge at Grand Central Terminal |
 As much as hubby and I would have loved to have sipped on a cocktail or two (well, micro-brewed beer would probably be more like it) at The Campbell Apartment and dined on succulent oysters at the Oyster Bar, we were a bit worse for the wear. Between a restless night's sleep (the hotel bed was not our blissfully comfortable Tempur-Pedic) and the train ride into the city, followed by my 2 hour appointment and some crazy cab rides to and from place to place, we needed something satisfying that would still allow us enough time to catch our train back to the station and our car in Poughkeepsie for the 3 - 4 hour drive back home. So we opted for one of the "Casual Dining" restaurants in the concourse instead. We chose a place called Zocalo because it gives the diner the option of either going to the counter and ordering, then taking your food to one of the hundreds of (quite lovely) seating areas that are open to the patrons of any/all of the restaurants/vendors OR their own seating area where you can grab a table and be waited on in a more relaxed setting. Needless to say, after the long day that we'd had, we were definitely happy to sit down and have someone wait on us!
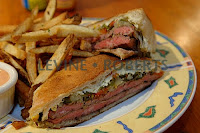
(We didn't have our cameras with us, so I had to find some pictures that looked as close as possible to what we had) Both of our meals were absolutely delicious and it was obvious that they were prepared with fresh, quality ingredients. I adore a good Cuban sandwich and this one did not disappoint. The roasted and shredded pork was moist, tender and beautifully seasoned. The ham was carved right off the bone, as opposed to the standard deli sliced ham usually found on most Cubans and the cheese was a perfectly stringy and slightly salty delight. Now, I don't want to give the impression that there's anything wrong with sliced deli ham..... This version was just a very pleasant surprise. The fries that I ordered to accompany it were piping hot and the perfect combination of soft inside and crispy outside.
 Hubbs proclaimed that his Tostada was one of the best he's ever had and that it was spiced well. This most likely means that it would have been considered in the "medium hot" range for the majority of people, which is a little too spicy for me, but I simply don't have the asbestos tongue that he does. (Our fridge and pantry are never without a supply of different sauces made with a plethora of chili peppers from Jalapeno to Habenero) I'm not ashamed to admit that I'm a total wimp when it comes to hot and spicy food. He was also quite happy with the Cholula Hot Sauce that was provided on each table.
We really only had a few minutes to look around at the many offerings available in the concourse, but I would have loved to have had the time to sample just a little something from each one. There is a choice of cuisines for pretty much every taste, from Indian to Barbecue to Kosher Deli. The list is too long to include here, but there is a directory online here, if you're planning to be in the neighborhood of Grand Central Terminal in the future. Believe me, if we hadn't been all fat and happy from the yummy meal at Zocalo, I'd have seriously considered a slice of cheesecake from Juniors. There's also the Magnolia Bakery, Zaro's Bread Basket, Neuhaus Chocolatier and sooo many other places to indulge even the mightiest of cravings for anyone with a sweet tooth.
Next time, I think we'll factor in a couple more hours to our trip, just so we can spend more time roaming around (and possibly nibbling our way through) the wonderful restaurants and shops at Grand Central Terminal. We never even had a chance to peruse the famed Grand Central Marketplace, and I have a feeling that could take us half the day!
Live Well, Eat Well
In This Post:
Chronic Illness,
NY City,
Restaurants,
Travel,
Unexpected
Subscribe to:
Posts (Atom)


