


Creamy Chicken Enchiladas
(serves 8)
Pre-heat your oven to 350°F.(serves 8)
- 4 Boneless, Skinless Chicken Breasts, cooked and shredded
- 2 8oz Bricks Cream Cheese, softened
- 1 Cup Half & Half or Full Fat/Whole Milk
- 2 7.5oz Cans Chopped Mild Green Chilies
- 2 Tsp Garlic Powder, divided
- 2 Tsp Ground Cumin, divided
- 1 Tsp Mild Chili Powder
- 2 Tsp Kosher Salt, divided
- 1/2 Tsp Fresh Ground Black Pepper
- 1 8 Count Pkg Large Flour Tortillas (often labeled Burrito Size)
- 3-4 Cups Shredded Sharp Cheddar Cheese (or Mexican Blend)
- 1 Tbls Butter, Vegetable Oil or Cooking Spray
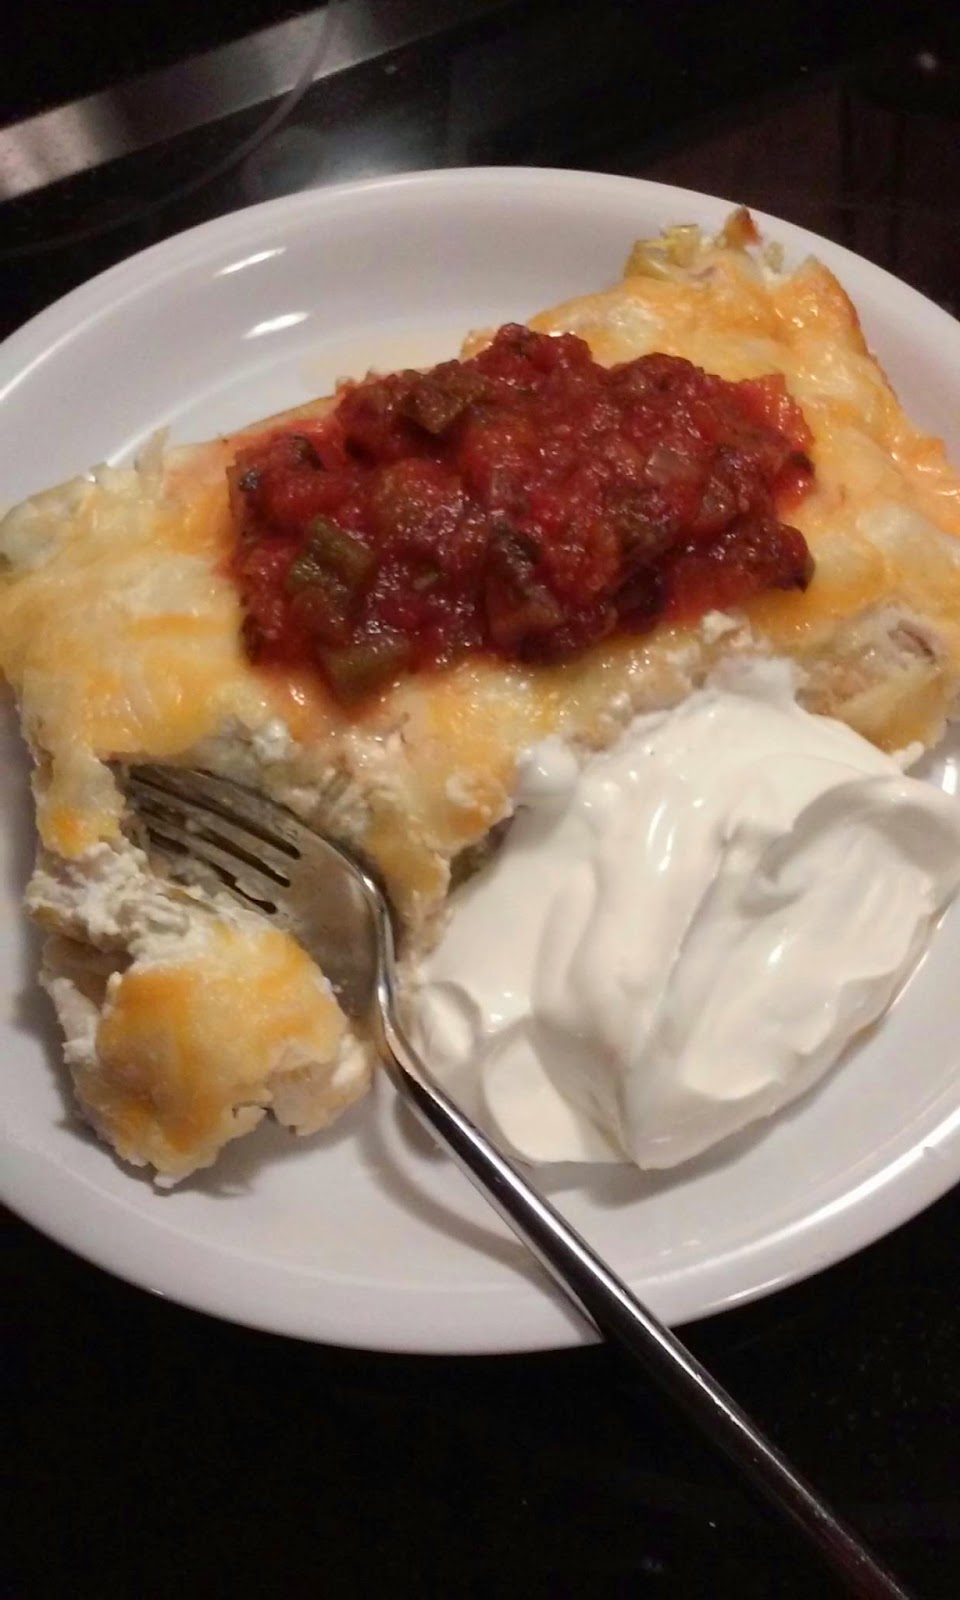
- Salsa & Sour Cream for serving
1. Cook and shred your chicken and set it aside in a large mixing bowl. You can poach, bake or pan saute it, which is my preferred method. Just make sure that it's cooked all the way through, but don't overcook them either. It will be cooking a bit more in the oven when you bake the dish.
The chicken can be cooked a day ahead and placed in an air-tight container in the fridge. Or you can purchase a rotisserie chicken from the store and shred that. Just bring the meat up closer to room temperature before rolling the enchiladas.
So how do you know when your chicken is done, but not overdone? (See Tip #1 at the end of this post)
 |
| I wasn't cooking in my own kitchen on this occasion, so things were a bit discombobulated and I didn't get a picture of the shredded chicken before adding the sauce to it. I think you can still tell from the photos what the shreds look like. |
This step might take a little while, but no matter how tempted you are to speed things up, do not turn the heat up any higher. Cream cheese can scorch very easily and if that happens, the sauce will be ruined and you'll have to start over. This is why you want to have the cream cheese softened before you begin.

3. Take approximately 1 cup (maybe a bit more, if needed) of the cream cheese mixture and add it to the cooked chicken. You might need a little less or a little more, depending on how much meat the chicken breasts you've used actually yields. Mix well with a heavy large spoon. You want to coat all of the meat and bind it together a bit, but you don't want the chicken swimming in the sauce.

4. Line a 13x9x2 baking dish with aluminum foil. This isn't mandatory, but it helps a lot with clean-up.

5. Lightly grease the bottom and sides of the dish with a bit of butter or cooking spray. (You want to do this even if you're using foil, so the enchiladas don't stick to anything when it's time to serve them.)

6. Open your package of flour tortillas and place it at one end of a fairly long expanse of countertop, or on your kitchen table. The best way to put this dish together is to lay all of the components out in an assembly line fashion.

7. Add the remaining cream cheese mixture to another mixing bowl.

8. Pour the half & half, the second teaspoon of each of your seasonings and all of the chili powder, into the mixture and stir very well to combine.


9. I pretty much just eyeball it at this point because I've made this recipe so many times, but what you're looking for is a relatively loose consistency that will flow easily across a flat dinner plate when you tip and turn it slightly from side to side. Start with 1/2 cup of half & half and stir it in slowly, so as not to splash it all over yourself or the kitchen.

10. Gradually add the rest, as needed. The one cup should easily do it, but if you do need a bit more (or a bit less) to get it to the right consistency, it's best to add it only a tablespoon or two at a time. I find that a whisk works best for this part. The only lumps you should see are maybe a few bits of the chopped green chili. If you have quite a lot of those pieces, remove them with a teaspoon and add them back into the bowl with the bulk of the thicker cream cheese mixture in it.

11. Pour or ladle out some of this liquid-y mixture onto a large flat dinner plate that has a slight lip on it and is large enough in circumference to fit your tortilla. If you don't have a dinner plate that's large enough, you can use any good sized shallow dish. What you need is a vessel that will keep the liquid inside and is big enough to hold the tortilla, without having to bend or fold it. A 9" or 10" pie plate or tart pan works very well, too. You also want to use tortillas that are very fresh because they are the most pliable.

12. Once you have each of these components ready, line the various plates and bowls up on your countertop. (**See Tip # 2 at the bottom of this post for the best working order in which to line them up)

13. Take your first tortilla out of the package and lay it flat in the dish with the thin liquid. Leave it there for just a couple of seconds and then using tongs or your fingers, turn it over in the plate and leave it for another couple of seconds. You want the tortilla to be lightly coated with the liquid on both sides, but you don't want it to become too soggy. The liquid will slowly dissipate with each of the tortillas, so just add a little bit more and continue.

14. Place the dipped tortilla on the clean "rolling" plate (you could also use a large sheet of parchment paper, a plastic cutting board or a cookie sheet for this part) and with a spoon, scoop out about 1/3 cup of the shredded chicken and place it in the center, but slightly closer to the end nearest to you. Sprinkle a handful of the shredded cheese on top of the chicken mixture and roll up the enchilada. (if you've never done this before, you can watch the short video below to learn the best way to roll and wrap)
This is a very short video, just to give you an idea about how to wrap an enchilada, burrito or a sandwich wrap. For enchiladas, the flour tortilla will need to be pretty pliable, but that shouldn't be an issue because it will (hopefully) be fresh and it will be dipped into the half & half mixture before rolling.
Yes, I know. Your hands do get a bit messy by dipping the tortilla first, but trust me... it really does make a difference in the texture of the finished enchilada and you'll be glad that you took this extra, but pretty easy step. If you're just not a big fan of even temporarily messy fingers, just keep a large damp tea towel or paper towel on the counter next to you and you can wipe your fingers clean in between rolls.

15. As I mentioned before, since I wasn't in my own kitchen when I made these, I missed photographing a couple of the steps here and there. But, I think it goes without saying that as you finish rolling each enchilada, you want to place it in your prepared baking dish. I'm usually able to easily fit all eight enchiladas in a 9"x13"x2" pan. (see the photo below to get examples of how to place them in two different ways)

16. Once you have all of your enchiladas in the baking dish, pour the remaining cream cheese and half & half mixture over the top and sprinkle on the remaining (about 2 cups) of shredded cheese.
If you don't have much of the liquid left over mix about 1/4 cup of sour cream with 1/4 cup of half & half, season it with a half teaspoon of each of your seasonings and mix well. Then pour that over the top before adding the cheese. It's not that you want the enchiladas swimming in liquid, but you do want them to have some moisture.

17. Bake, uncovered, at 350°F for approximately 30 minutes or until the enchiladas are heated all the way through and the cheese is bubbly and lightly golden brown in color.

18. After removing the pan from the oven, allow the enchiladas to rest for about 5 minutes, so they can set up a little. You should be able to see the outline pretty clearly of where each of the enchiladas ends and the next one begins, to provide you with a guideline for cutting and serving, nice equal portions. In a buffet setting where there will likely be several other dishes for your guest to choose from, you can even cut each enchilada in half to make them go twice as far.
If you're not making these for a group, the leftovers freeze quite nicely. I just cut the remaining pieces into full or half-sized portions, wrap each one in plastic wrap and store all of them in a large covered plastic container or a large tightly sealed zip-top freezer bag.
If I'm making these for a Cinco De Mayo party, I'll also cook up some refried or ham hocks & pinto beans and some Mexican rice, as well as several of our other favorite Mexican themed appetizers and sides. I serve it all buffet style.
*Tip # 1: When you're cooking boneless, skinless chicken breasts, (no matter which method you decide to use) one of the best tips that I can give you is to make sure that the pieces of chicken are of an even thickness and size. You can actually reduce the overall cooking time and make it easier to tell when or if your meat is done, in a couple of ways....
A) You can always pierce cooked meats with an instant read meat thermometer to test them for doneness, but although I think it's a great method for large pieces or whole roasted meats, I don't really like doing this with smaller cuts. It can allow too much of the natural juices inside of the meat to seep out of the holes that are left behind when the thermometer is removed.
B) My preferred method of checking for doneness with smaller cuts of meat, is to use the "touch test". When touching the thickest part of the meat with your index finger, it should just barely bounce back from a bit of light pressure. A good way to simulate this, is to use your hand as a guide. (below is a diagram that shows how to do this)

*Tip # 2: I line up my plates and bowls in the following order, to make the process go as smoothly as possible (the order is from left to right):
- The tortillas
- Flat plate with thin liquid
- Bowl of shredded chicken that is coated with sauce
- Another plate (of equal size or larger) for rolling
- The shredded cheese
- Prepared baking dish
Don't Forget To Follow Me On Social Media! I Post Blog Updates, Ideas For Kitchen "How To's", Restaurant Recommendations And Reviews And Always Lots Of Photos!
Don't forget that you can print this (or any) recipe using the "Print Friendly" button at the foot of each post. It's a great little feature that allows you to remove any pictures (or any text that isn't relevant to the recipe) before printing. That can save on ink and paper & in today's economy, who doesn't want to save a little cash when you can?!